Adding farmhouse wall decor is one of the simplest ways to infuse your home with this popular, cozy style.
Inspired by nostalgia for simpler times, it embraces timeless looks, weathered finishes, and the charm of everyday objects.
Farmhouse decor adapts beautifully to various interiors, from rustic to modern, and even complements styles like coastal or industrial.
While authentic vintage pieces offer a unique patina, excellent modern reproductions are widely available and affordable.
Get inspired by these ideas to bring warmth and character to your walls.
Use a wall shelving display to showcase individual style

Shelving with space for display is ideal as rustic wall decor, and the decorative pieces selected will bring personality to a living room.
‘We love utilizing things that are meaningful to our clients that add elements of relaxation and joy,’ says Nancy Charbonneau of Charbonneau Interiors.
‘In our Meadow Brook project, this family loves their horses, so we commissioned a local artist to create art for the home in a variety of mediums – paint, watercolor, line drawings.
These pieces became focal points throughout the home, showcased our clients’ passions, and supported the incredible artists in our community at the same time.’
Hang a mirror to create a fresh view
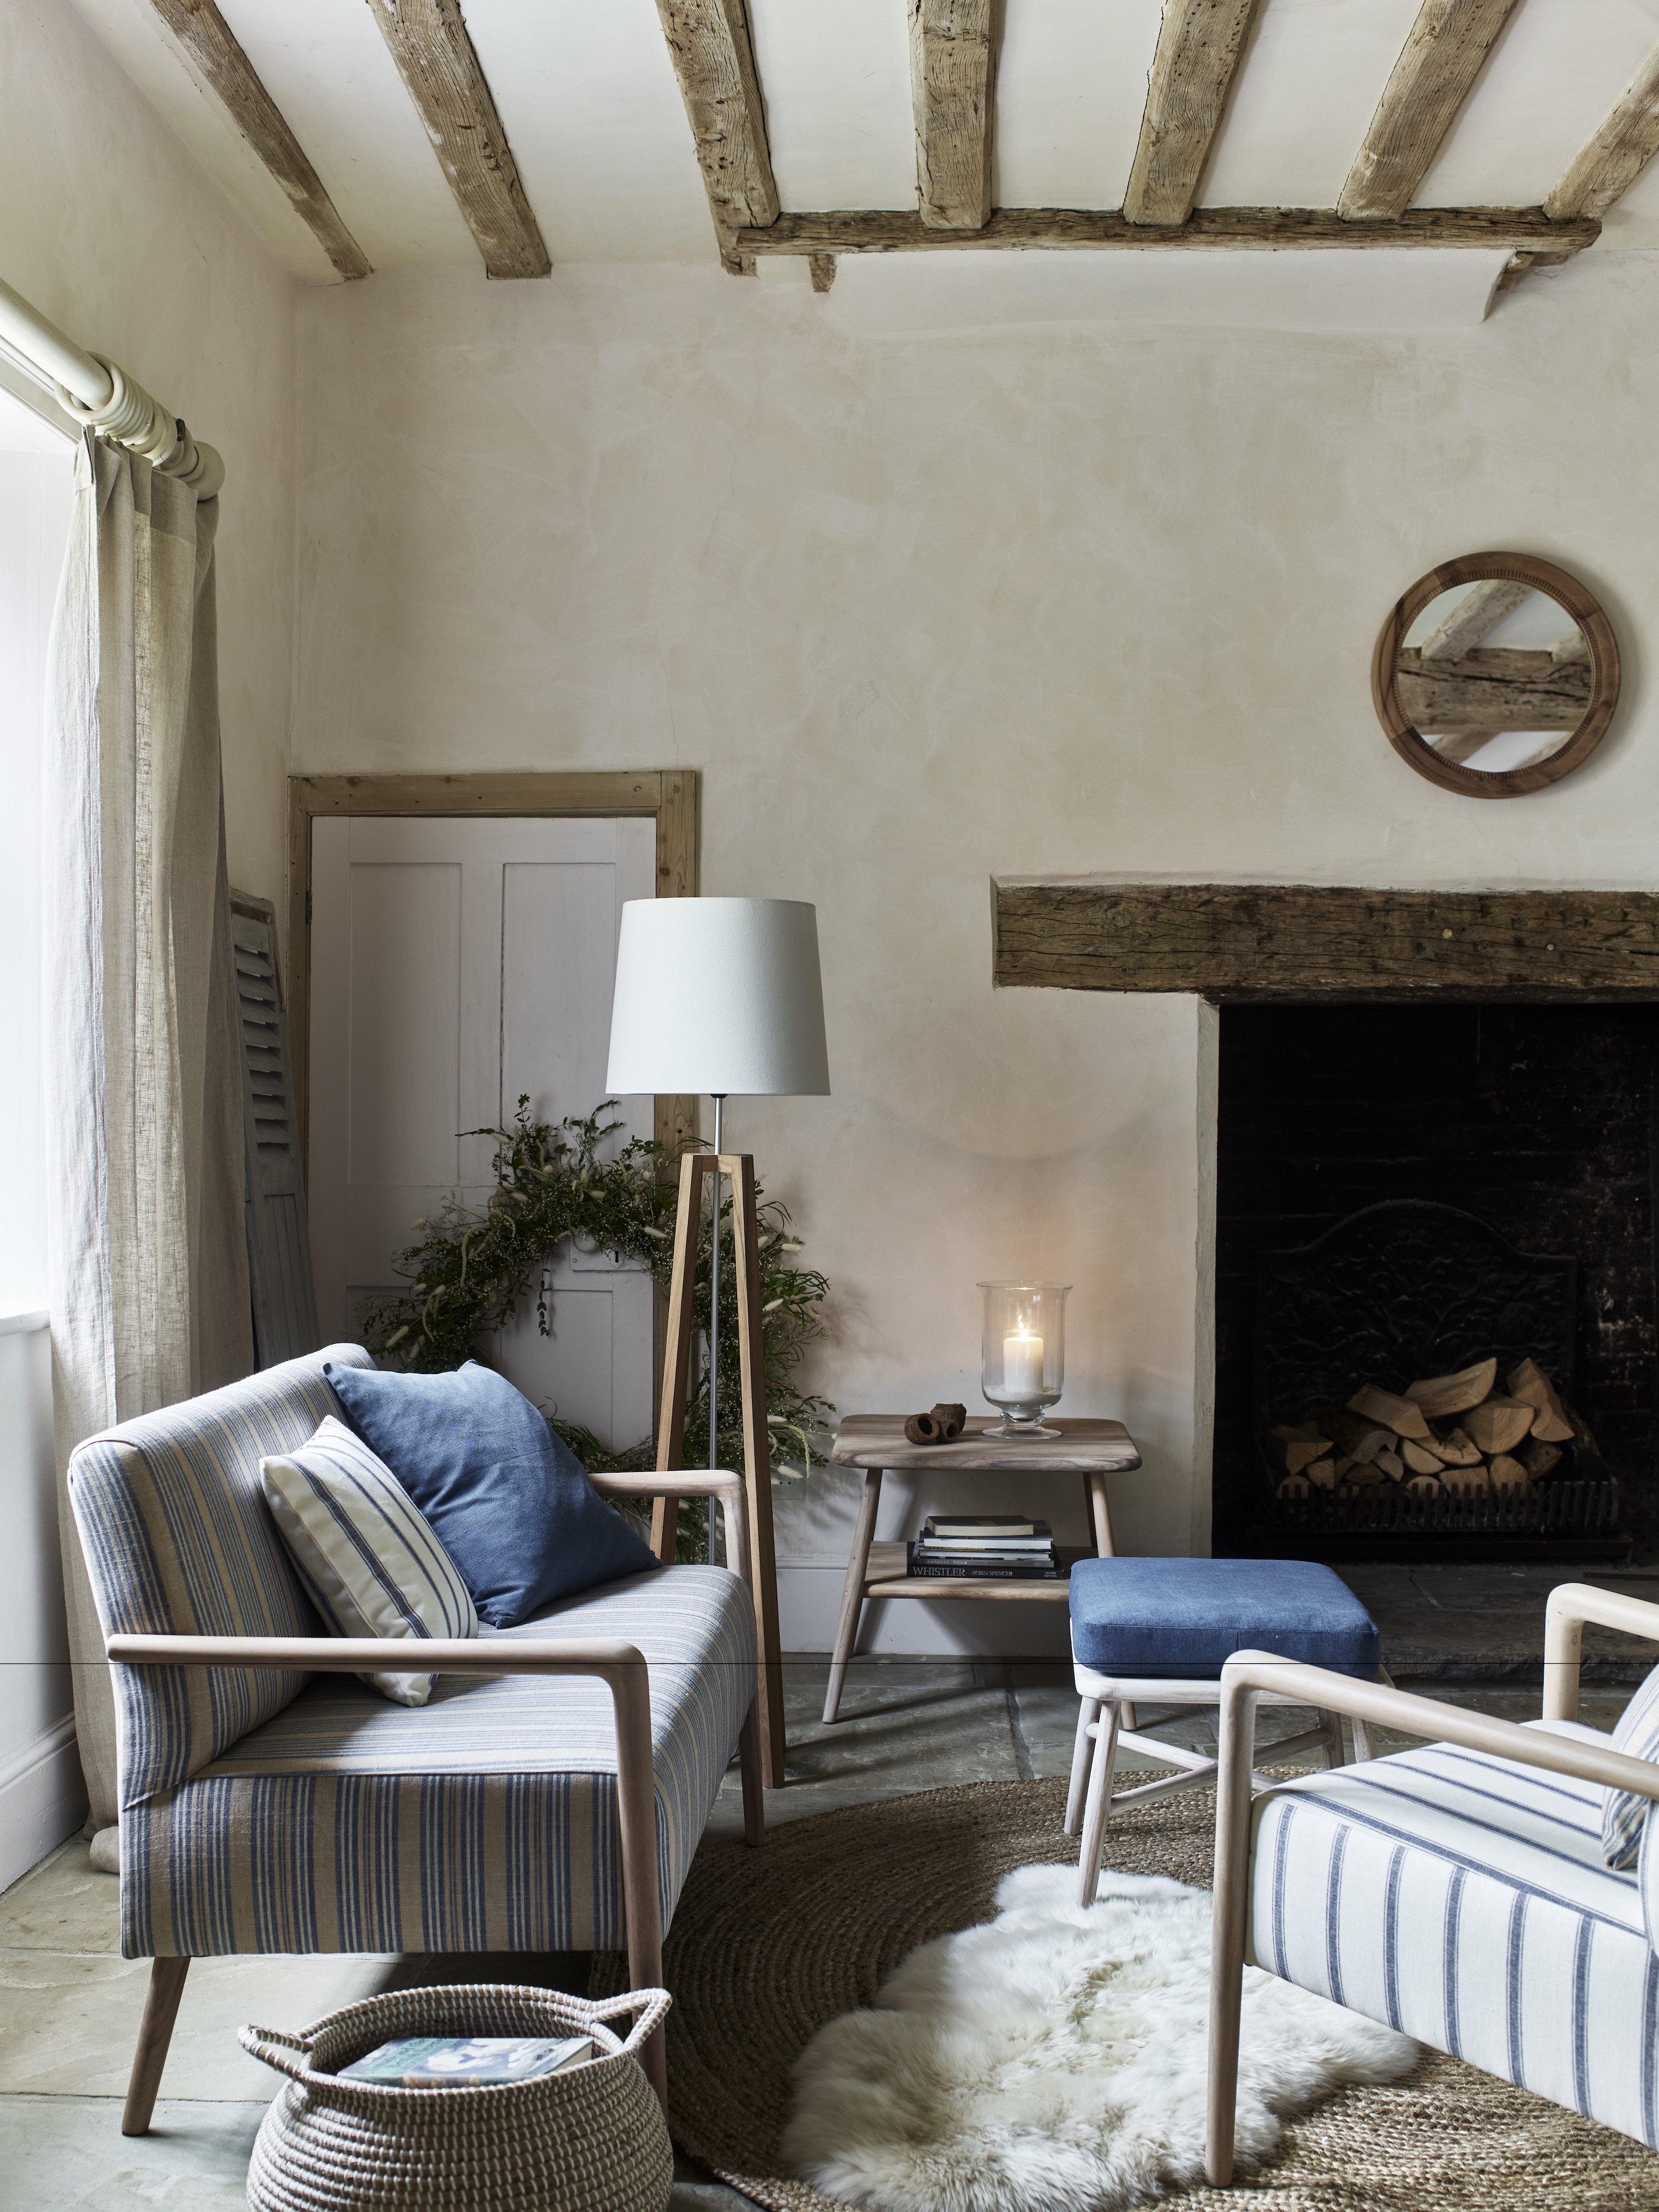
A mirror over the fireplace is a choice that suits many different interior styles, and it has its place as farmhouse living room wall decor, too.
Select the mirror frame to complement the rest of the materials palette: wood is the more rustic, textural option, but sleek metals are an alternative to play up the more contemporary complexion of modern farmhouse style.
Hanging a wall mirror will always multiply the light in a room. However, it can have a further advantage in a living room with exposed beams, reflecting the attractive features and creating a new view of them.
Choose neutral shades for a gallery wall

A gallery of pictures is a fabulous wall decor option, but how to make it a complement to the rest of a modern farmhouse scheme?
You could follow the example of this interior from Creative Tonic, and opt for images and frames in the same soothing neutral palette as the rest of the room for the perfect fit.
Creating an arrangement that breaks out from a rectangle suits the relaxed ambience of this room, but pictures should still be hung close to one another, as here, so the group reads as one.
Think about propping as well as hanging wall decor
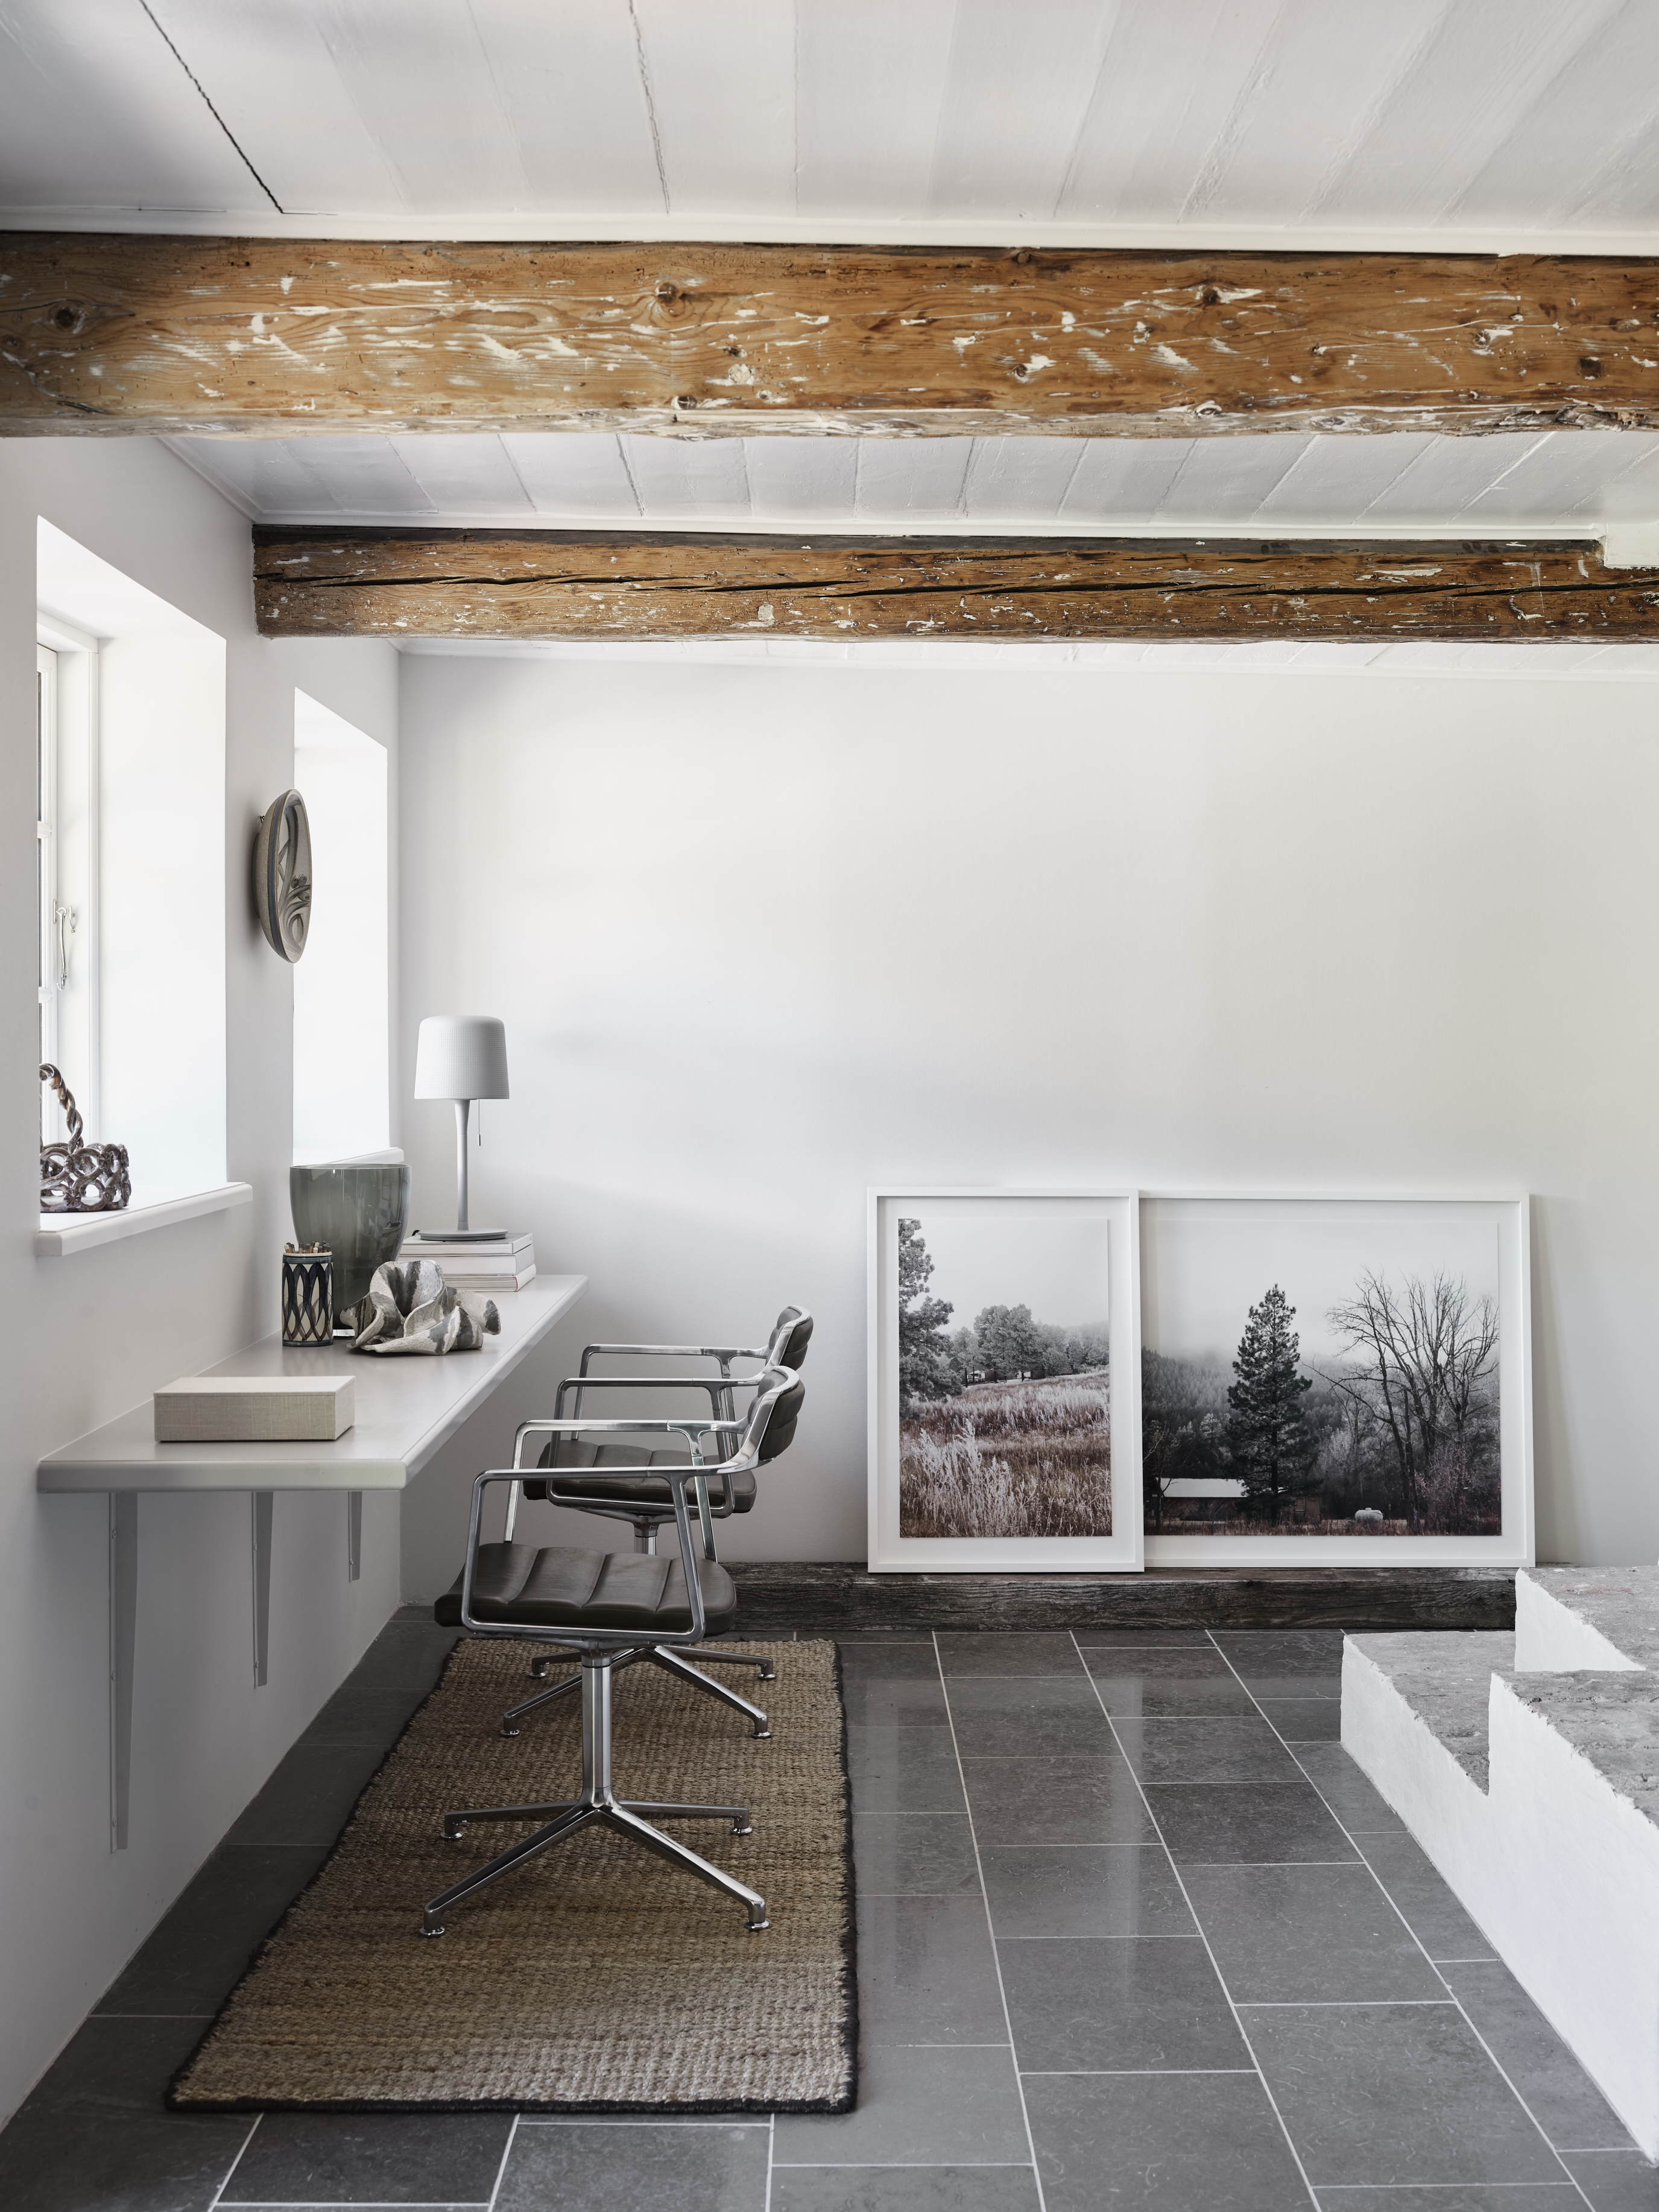
Wall decor doesn’t have to be hung high to be impactful, and the strategy of propping artwork has the contemporary credentials of modern farmhouse style.
Bear in mind that it’s important to choose sizeable pictures if they are going to lean against the wall rather than hang on it, and use the wall opposite the door to make them a focal point.
Images with a natural theme are ideal for farmhouse style, and black and white photographs or simple line drawings can be part of the room’s neutral scheme.
Consider textiles as wall decor
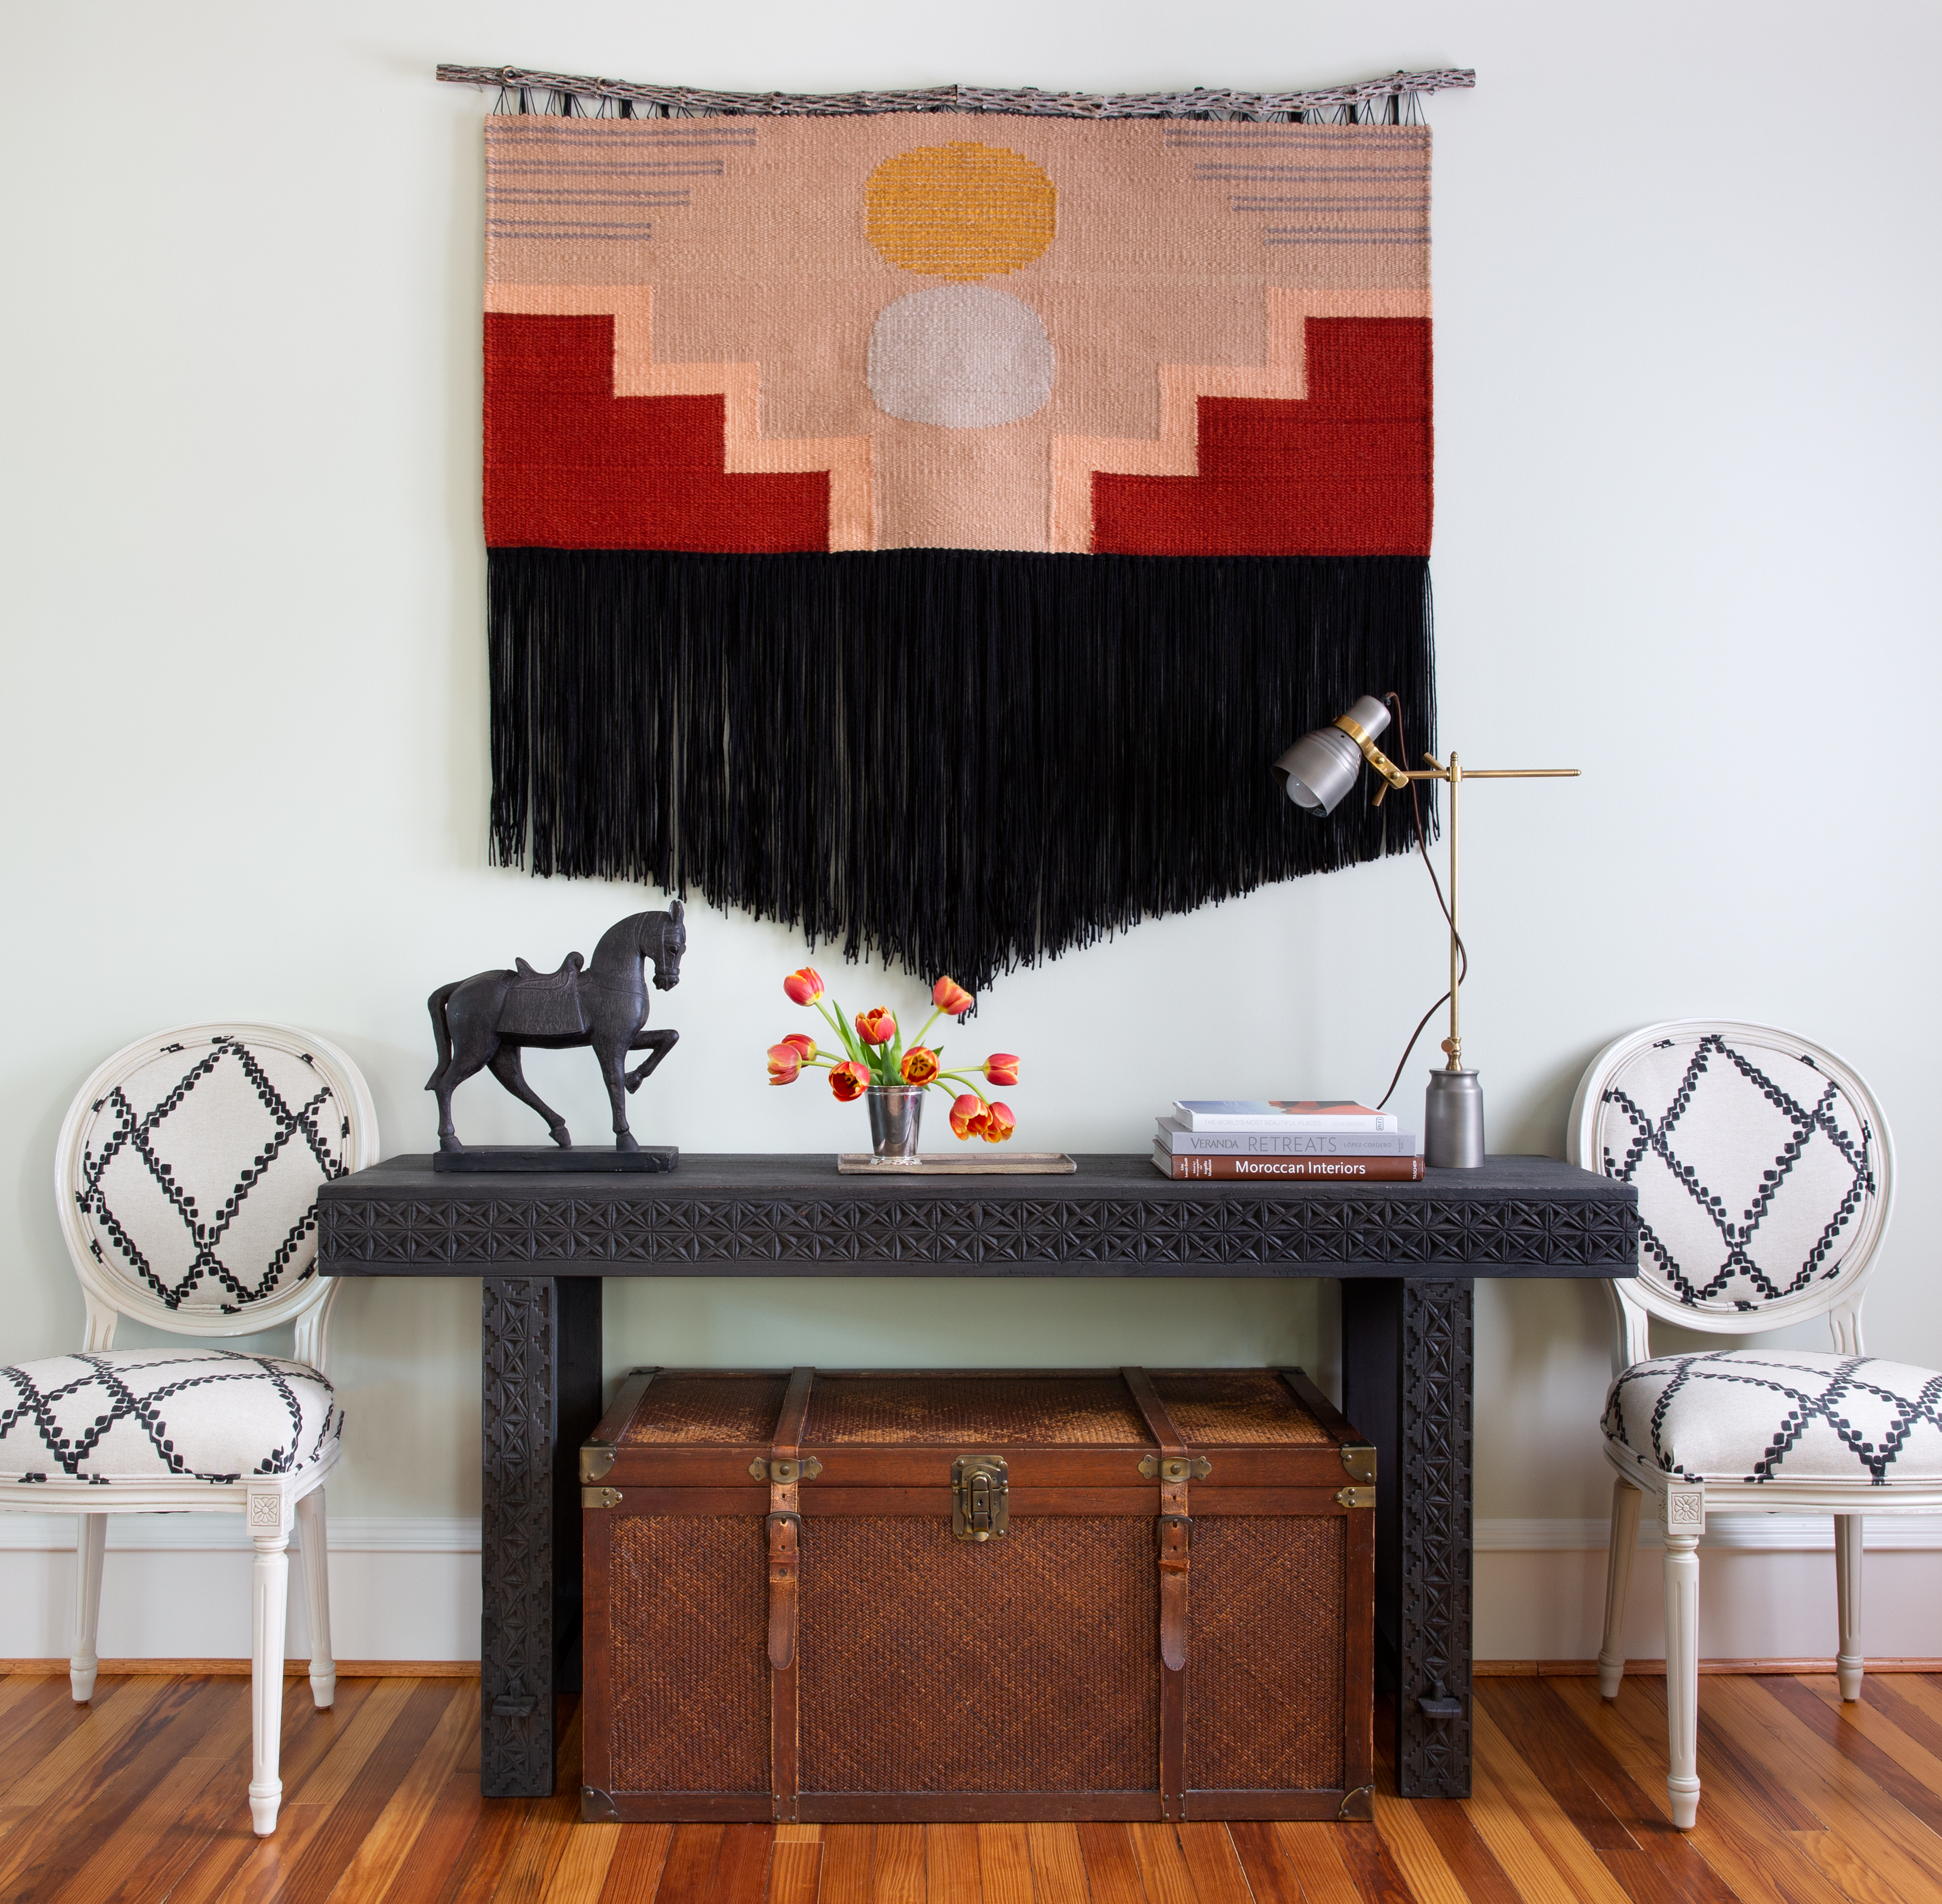
Tapestry and other textiles are a wonderful choice as rustic wall decor. ‘We selected a unique mix of furnishings and decor in this living room to reflect the eclectic taste of the homeowners,’ says Lauren Ramirez of Lauren Ramirez Interiors.
‘They brought the vintage trunk with them from the north east when they moved to Texas as one of their few heirloom pieces and we wanted to incorporate it into the room for a personal layer among mostly new pieces.
‘We commissioned the symbolic handwoven tapestry by Zanny Cox to honor the homeowner’s love of the landscape and cultures found in the American south west.
Bold carvings on the console and the graphic pattern on the side chairs complement the lines in the weaving and all of these selections are calmed by the soothing paint color in the room.’
Anchor artwork above furniture
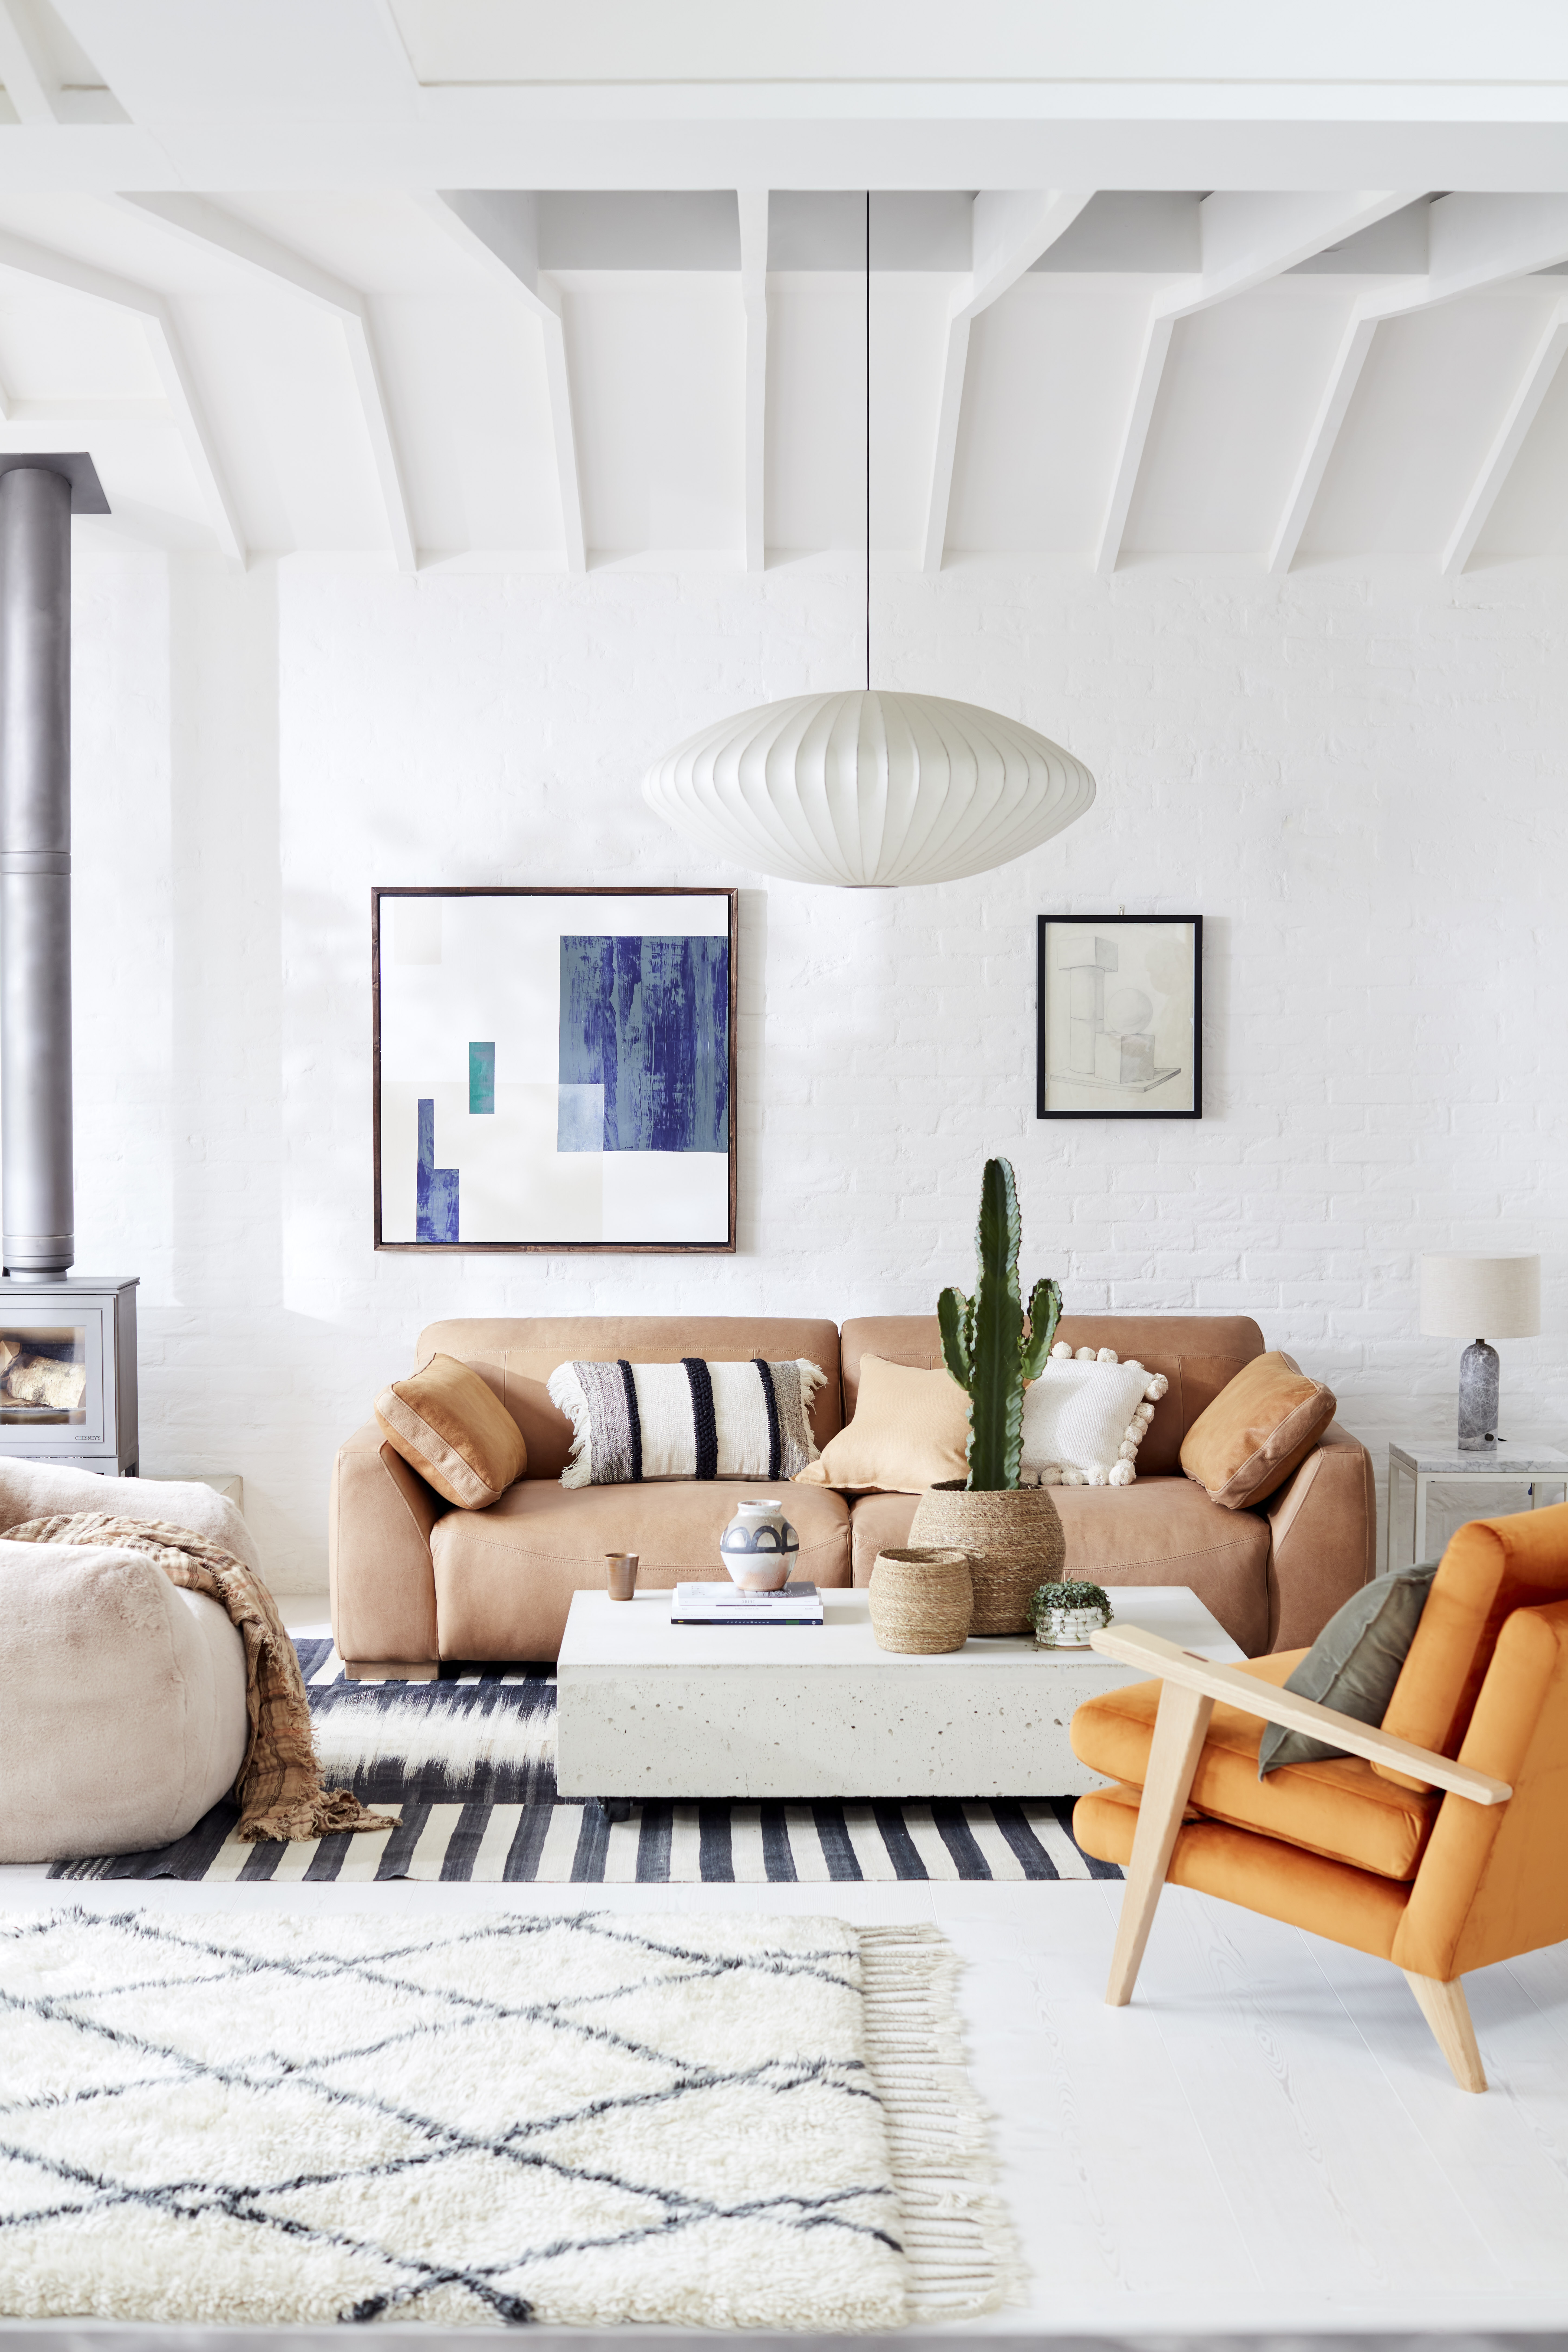
Artwork can seem to float on tall, white farmhouse walls, so visually anchor wall decor to a piece of furniture below.
That means keeping the distance between a sofa, table or other floorstanding piece minimal enough that it and the pictures above are associated.
But do bear in mind that wall decor above seating can’t be positioned where it will interfere with tall sitters.
Work with the dimensions of the furniture below from side to side, too, keeping the wall decor in the area above it as with this pair of paintings.
Ensure architectural elements stand out
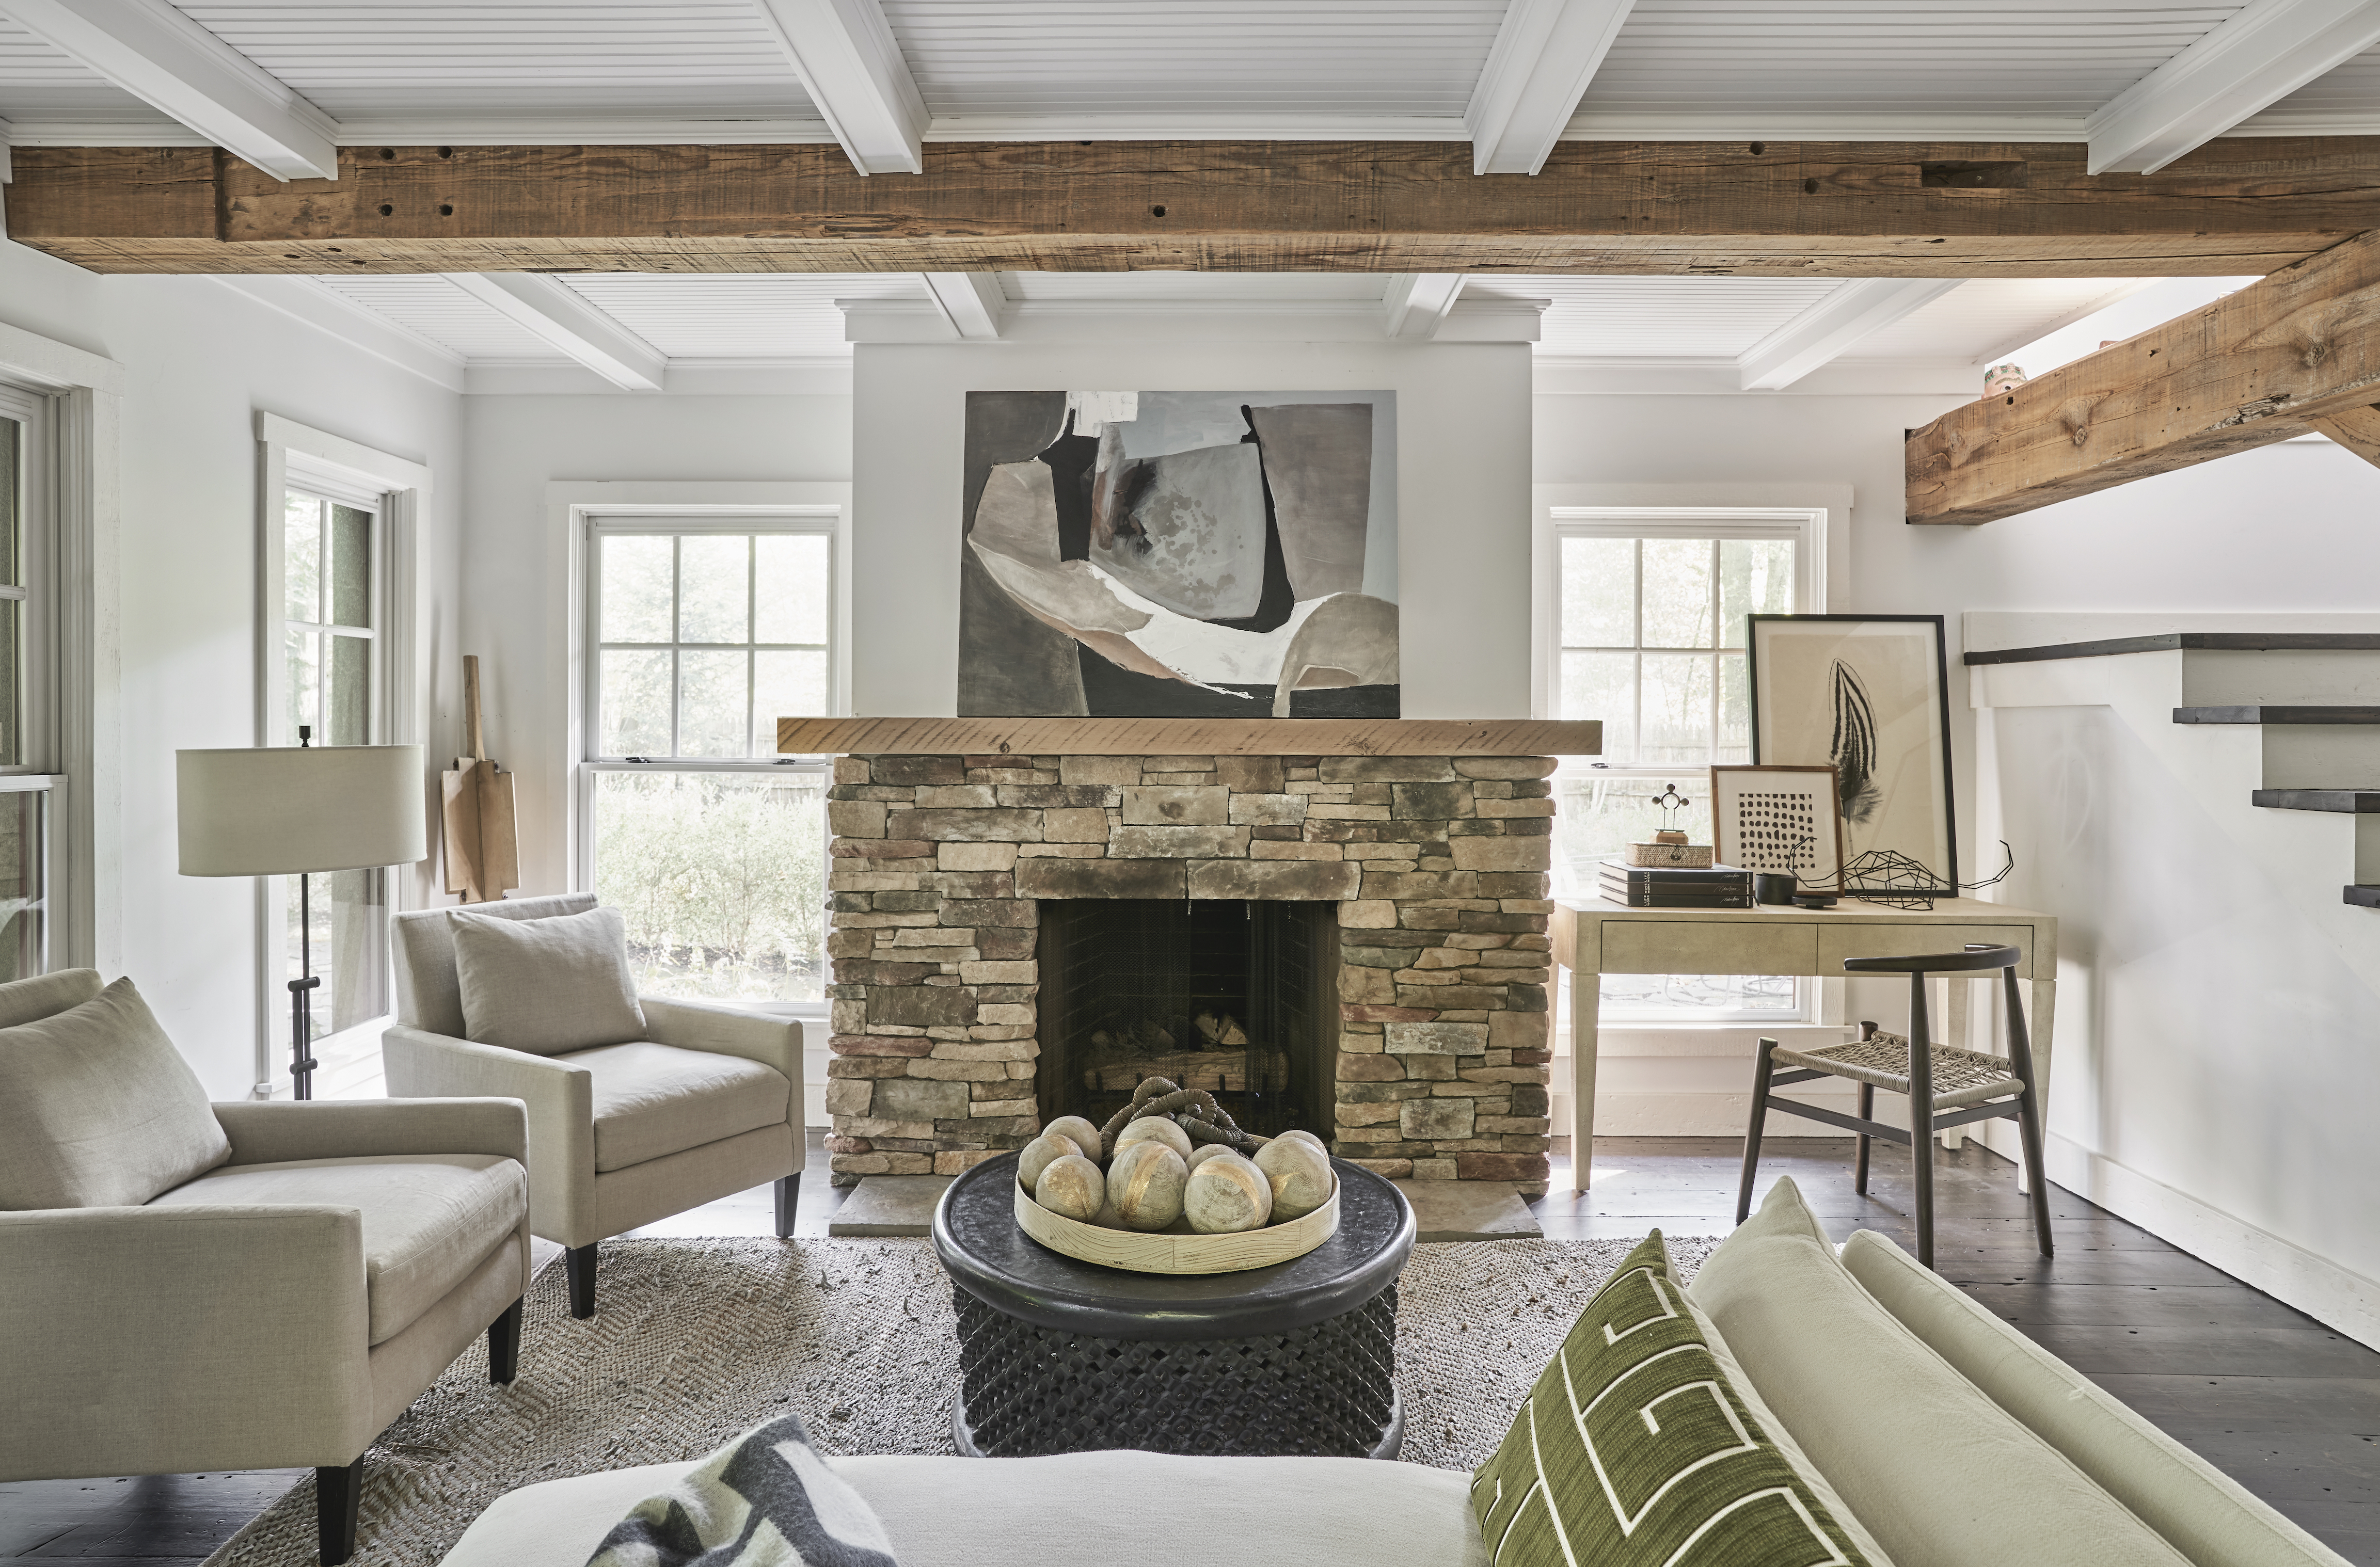
Make sure you keep the focus on the room’s features when you’re picking wall decor.
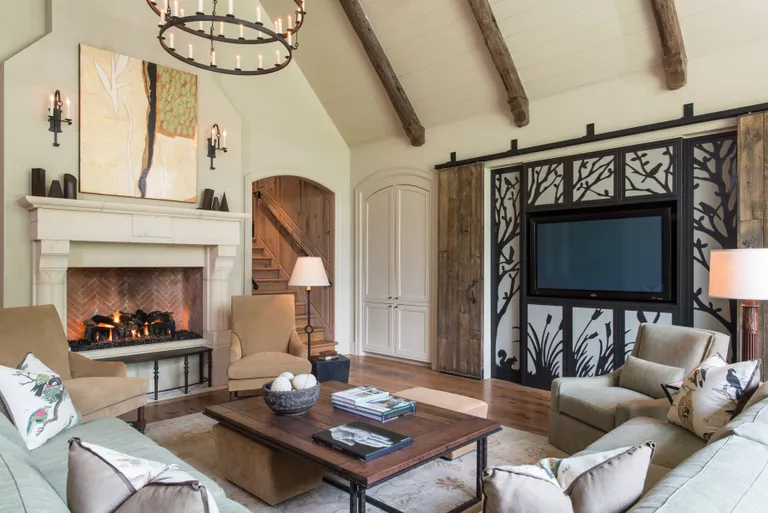
‘I specifically kept the room neutral and simple to really show off the architectural elements of the space – the stairs, the fireplace brick, and the beams were the stars of the show,’ explains Elizabeth Krueger of Elizabeth Krueger Design of this living room.
‘Adding in decor that doesn’t take away from the elements in the room is a great way to enhance specific details of the space.’
Work groupings
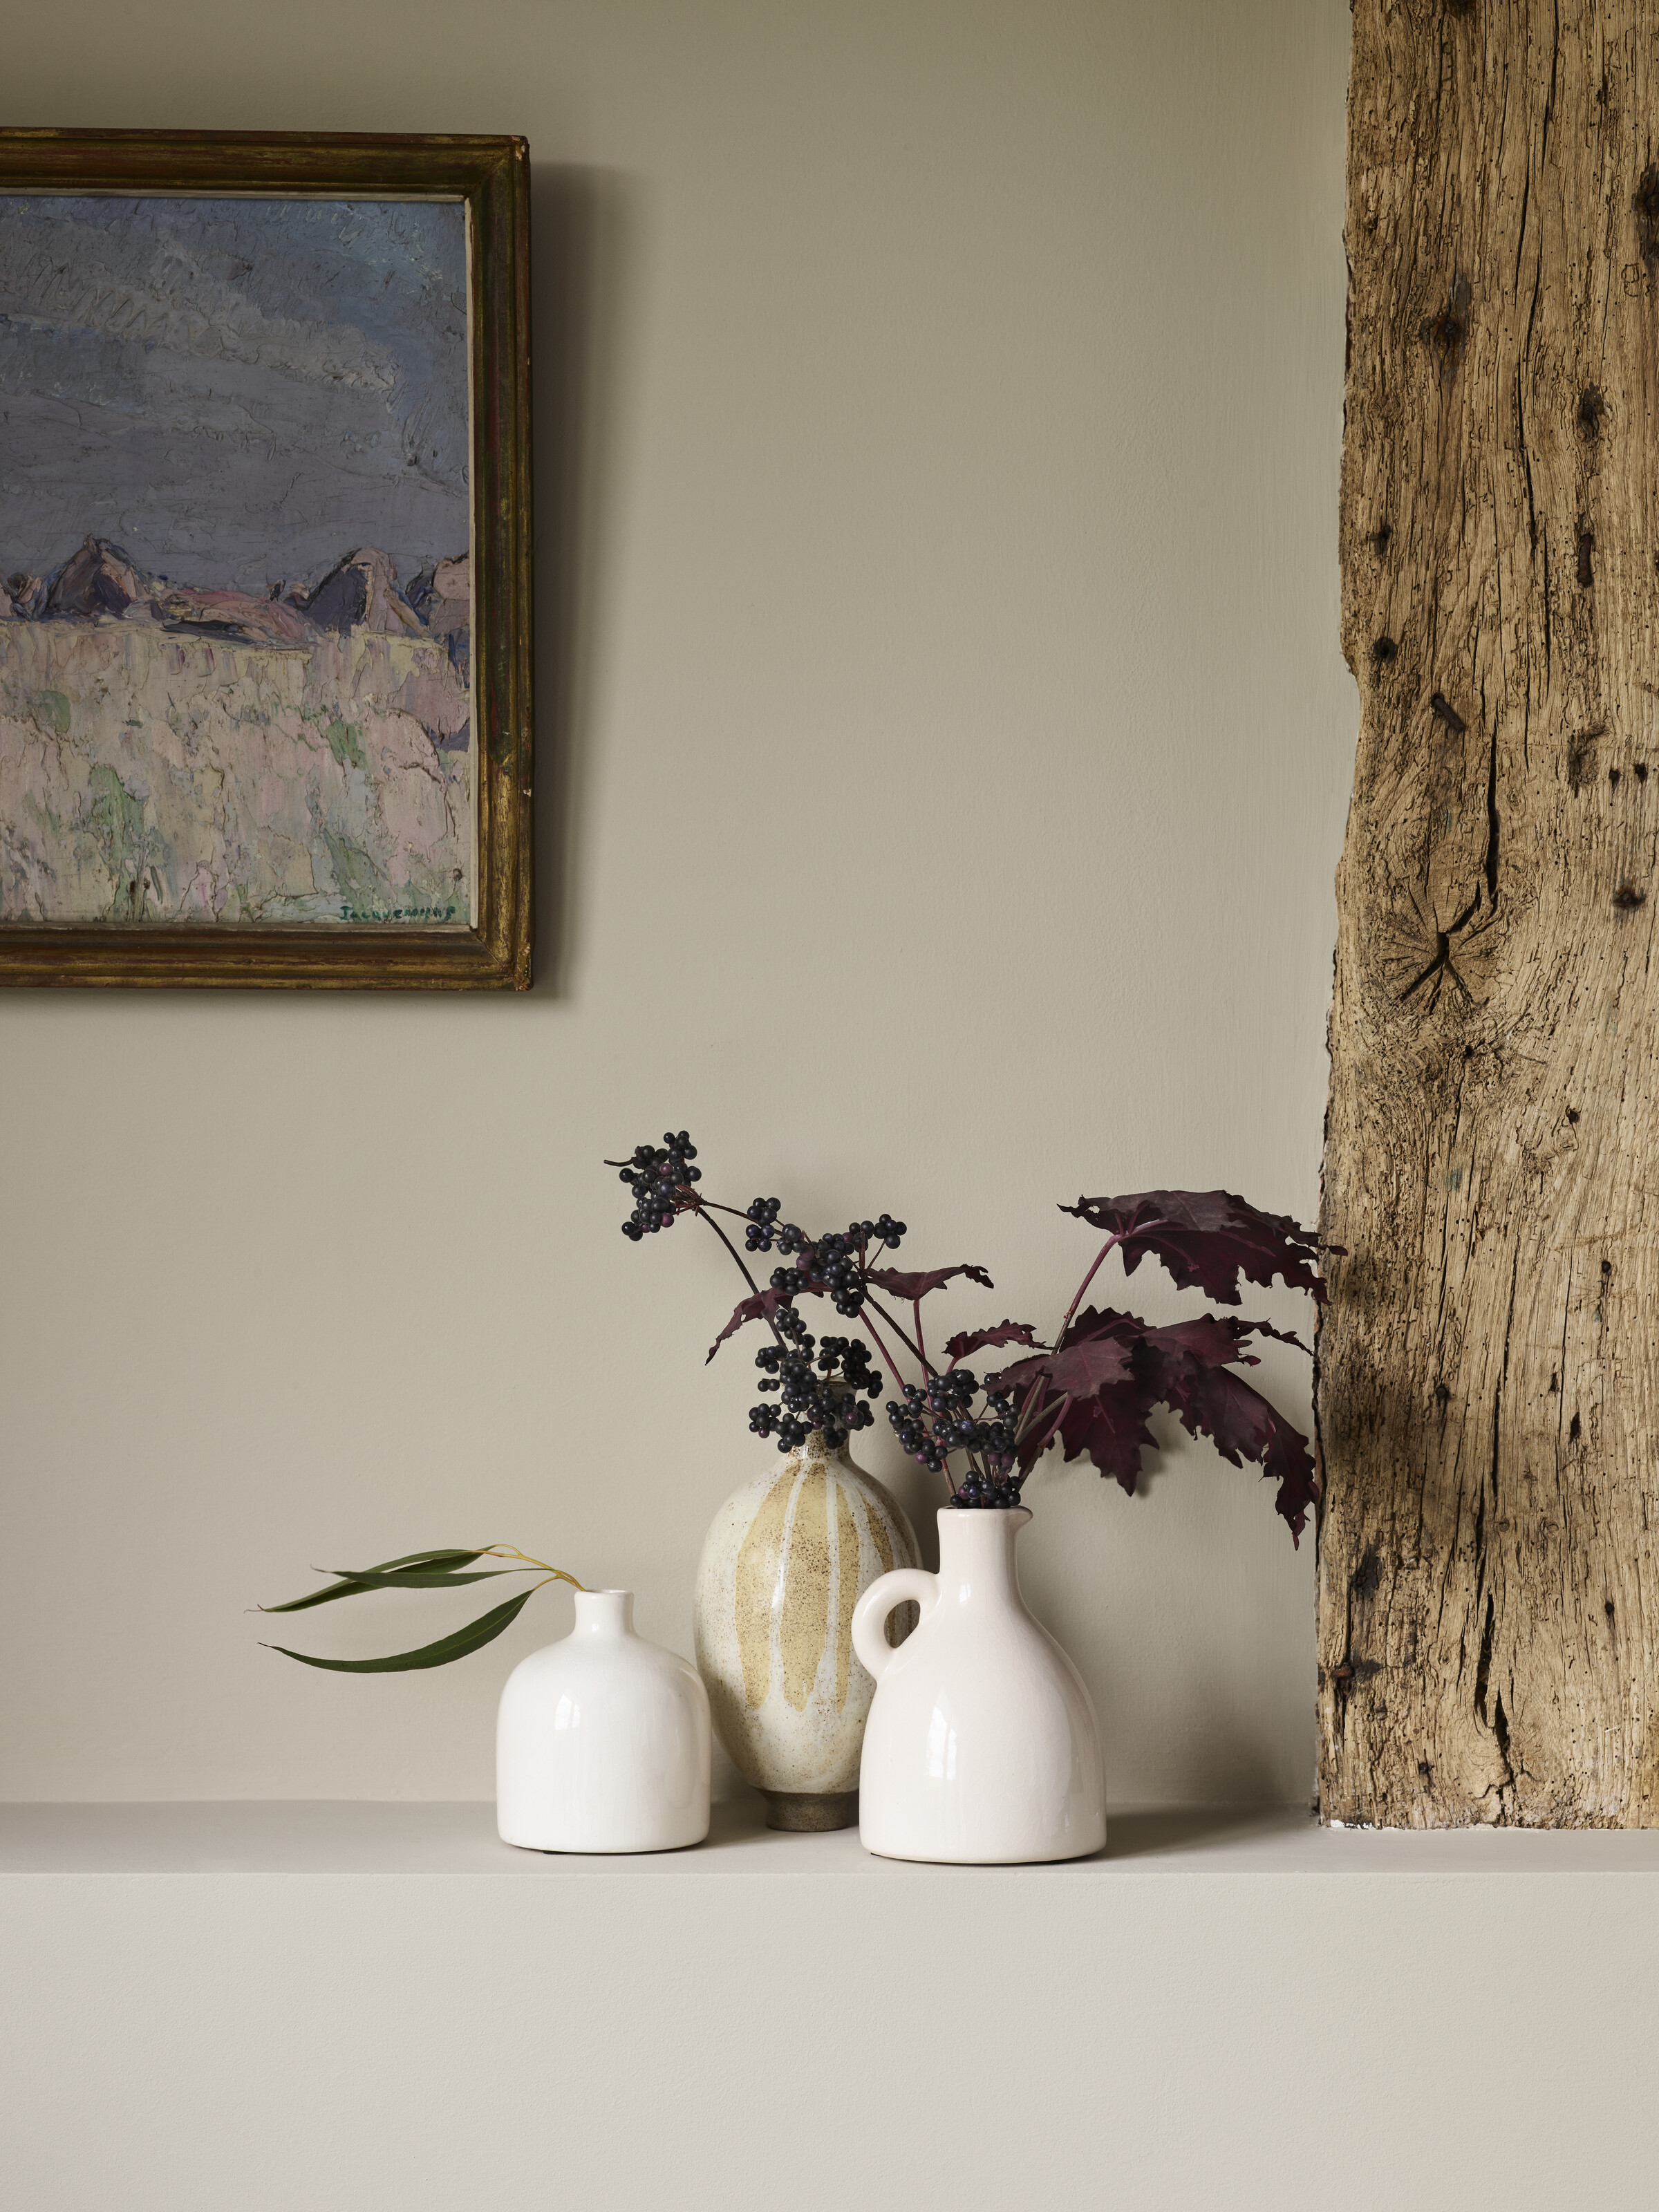
Layers of subtle detail are important for neutral room schemes, and farmhouse living room wall decor can be part of these.
Grouping ceramics on a shelf can be eye-catching without deviating from the subtle palette.
Pick different shapes, textures and heights and opt for the classic stylist’s pyramid shape for the arrangement.
Opt for vases and bottles and you can add foliage to the arrangement to maximize the room’s natural credentials.
Plan on harmony between the old and new
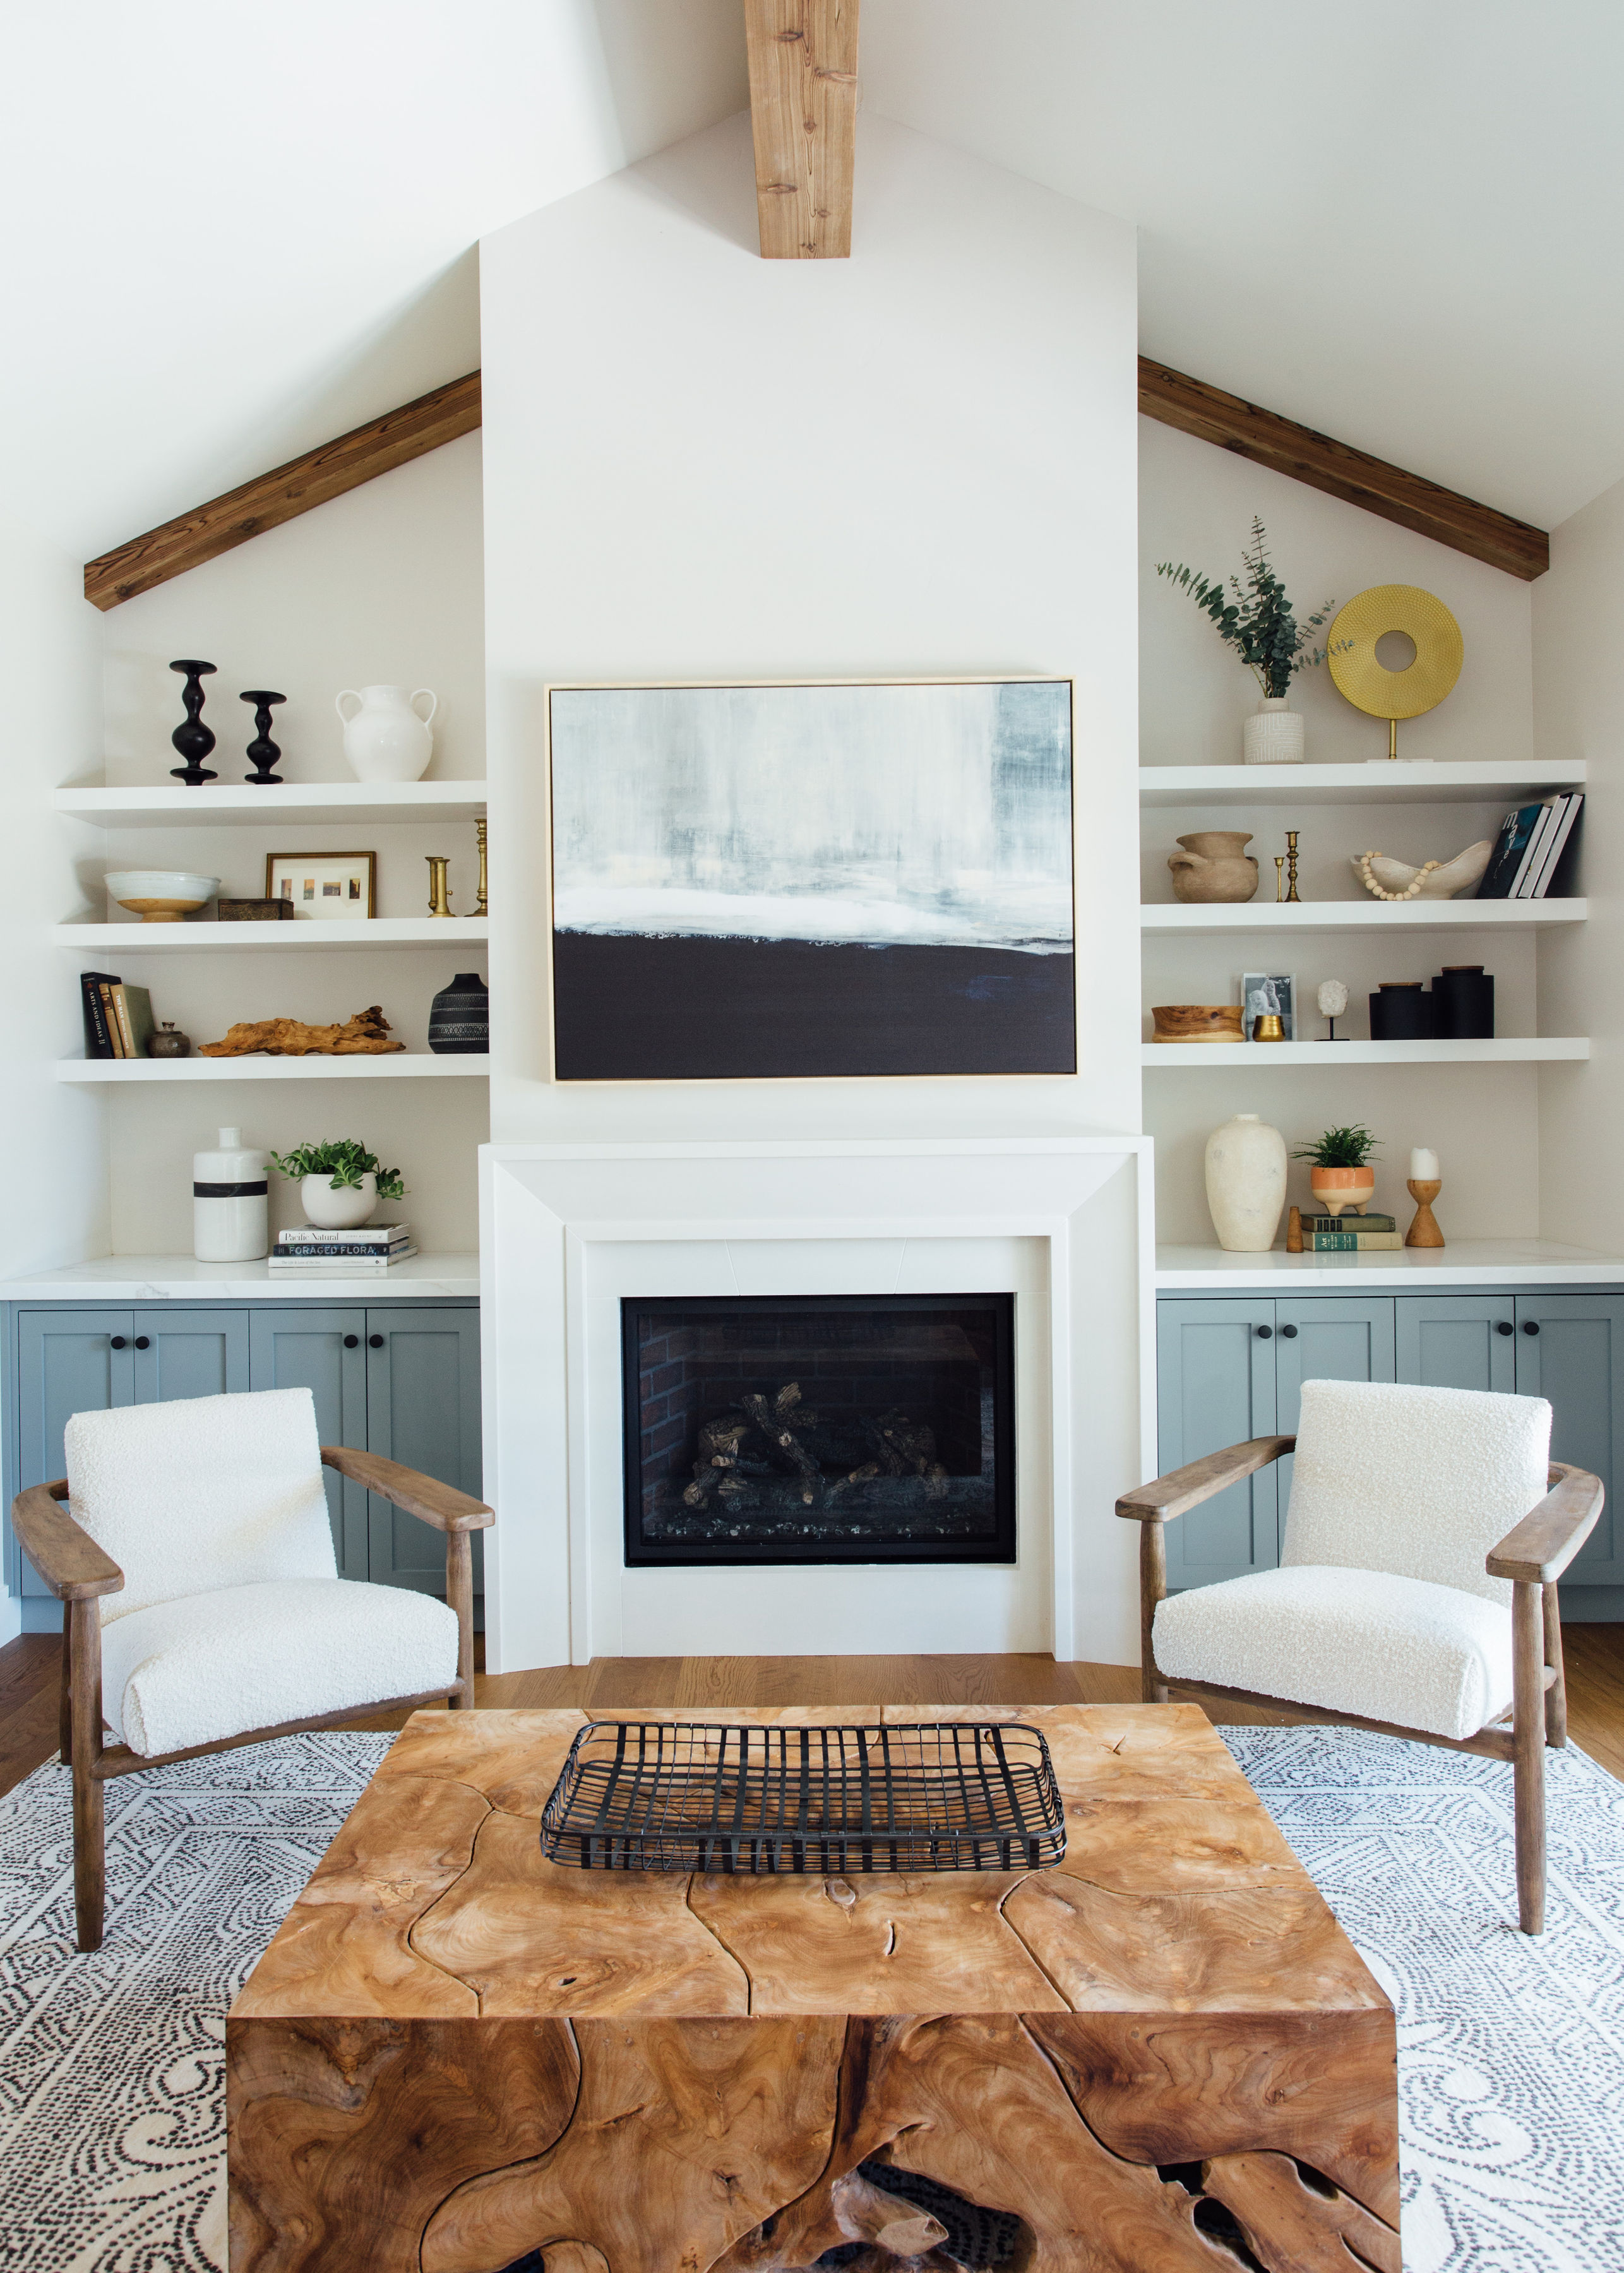
Modern farmhouse style celebrates the traditional, but blends it with the modern, and wall decor should reflect this.
‘For the shelf décor in this modern farmhouse living room we wanted a curated feel,’ says Michelle Lisac, founder and principal designer of Michelle Lisac Interior Design.
‘We included some of the client’s own items and mixed in other pieces that had either a nice patina or great texture. We used a lot of ceramics that we purchased new but that had a very timeworn look.
We also utilized some antique pieces such as brass candlesticks, pottery, and old trinket boxes that we picked up at Elsie Green in Concord, California.’
Make A Statement With Antique Signage
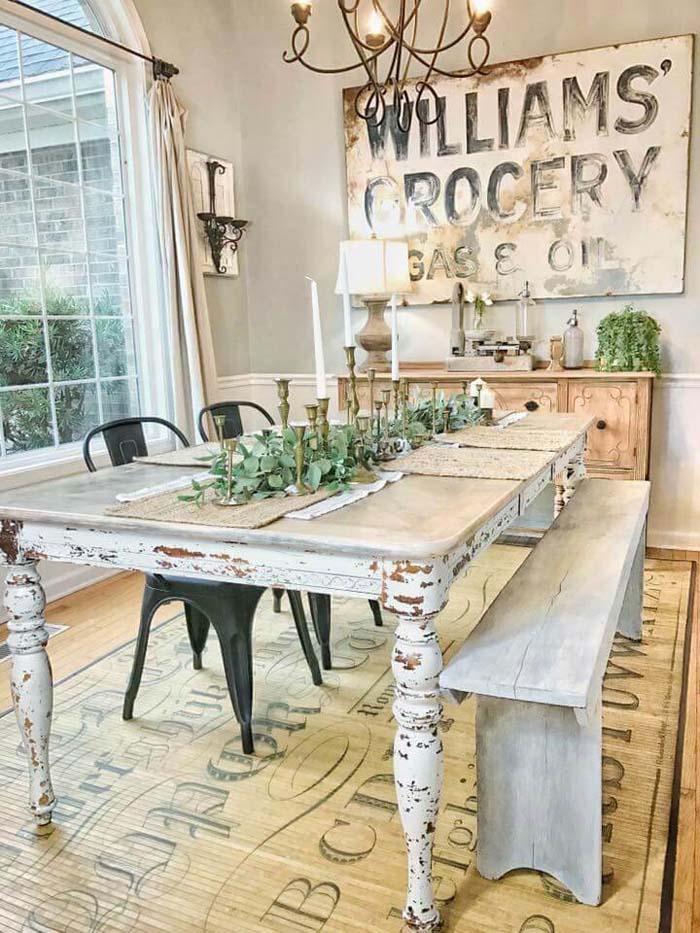
Add a large farmhouse sign to transform your dining room into a unique personalized space.
The sign may be authentic or newly made but with specific aging techniques that will make it look aged.
Its weathered look complements the sitting area design- repurposed, distressed, antique.
Add Farmhouse Texture With Burlap And Chicken Wire
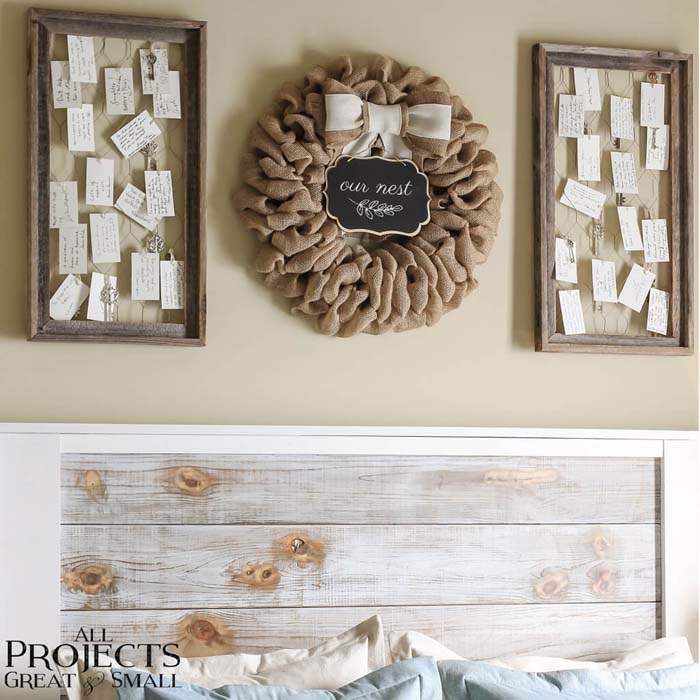
This wreath has been chosen to be the focal point of a master bedroom decor where the farmhouse style has a special contribution to making it so welcoming and relaxing.
The greenery is replaced with burlap ribbon. In its center, a small chalkboard sign says what this private room means to the owners.
On both sides of it, there are frames displaying wedding reception cards giving advice on which the keys to a happy marriage are.
The chicken wire is the perfect background to attach the cards easily together with the symbolic keys.
Distressed Signage And Architectural Salvage
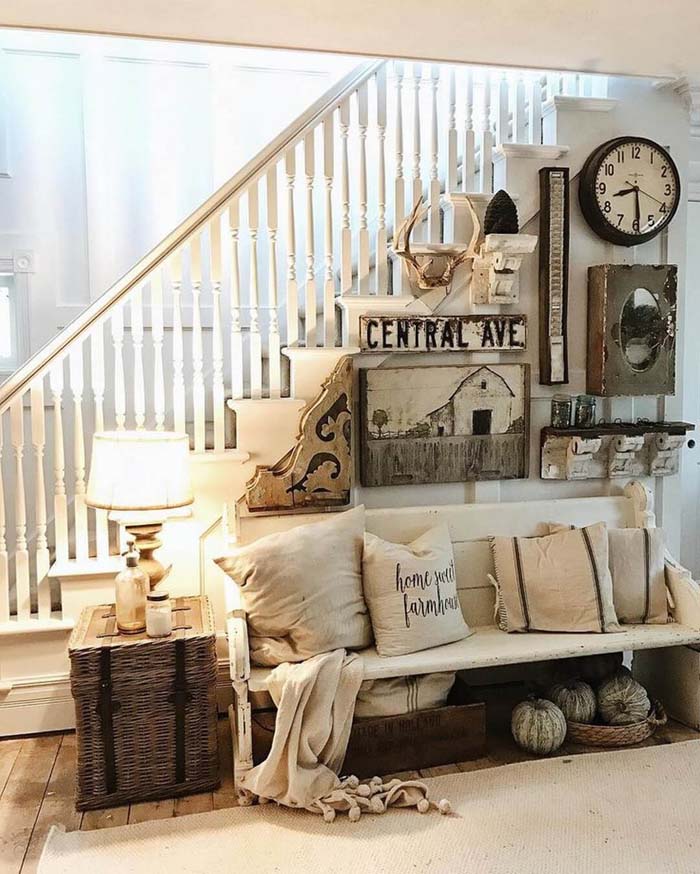
A collection of various types of farmhouse elements is displayed on the staircase wall to create a magical ancient setting where a person can relax and dream away.
The bench sitting on the floor offers four soft pillows wrapped in linen fabric.
The neutral colors are interrupted from time to time by dark brown or black colors to emphasize wording or accents.
DIY Chicken Wire Monogram
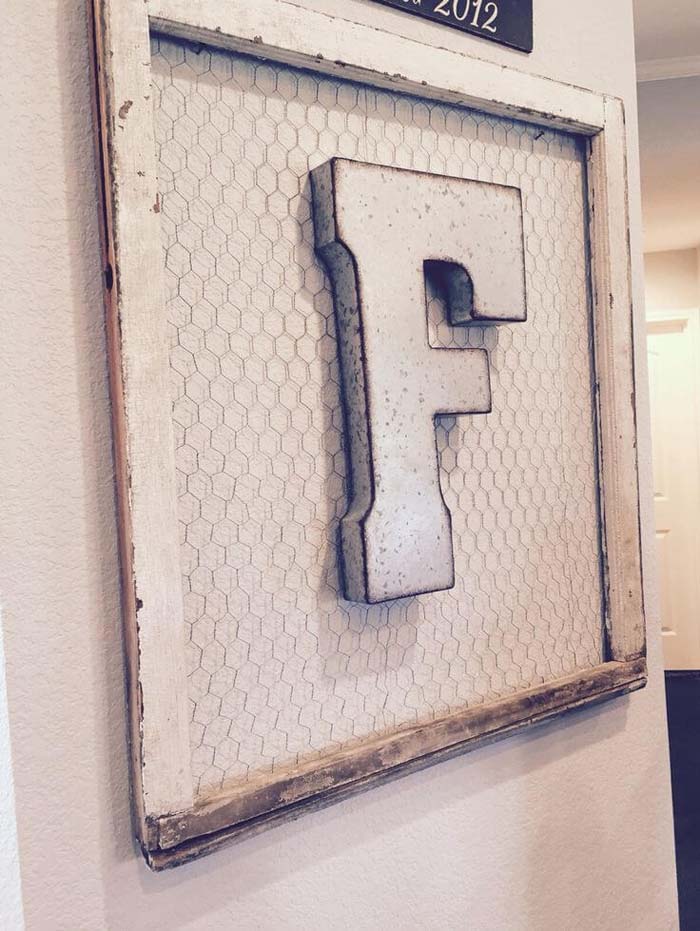
An easy way to make a place look homely is to use the family’s initial letter as wall art in the entryway or on the front porch.
This design is handmade and includes a chickenwire background that holds a big three-dimensional galvanized metal letter.
A reclaimed frame holds these together and allows hanging on the wall. Looking at the finished art, it adds a lot of rustic farmhouse feel with a personalized touch.
Make A Gallery Of Signage And Greens
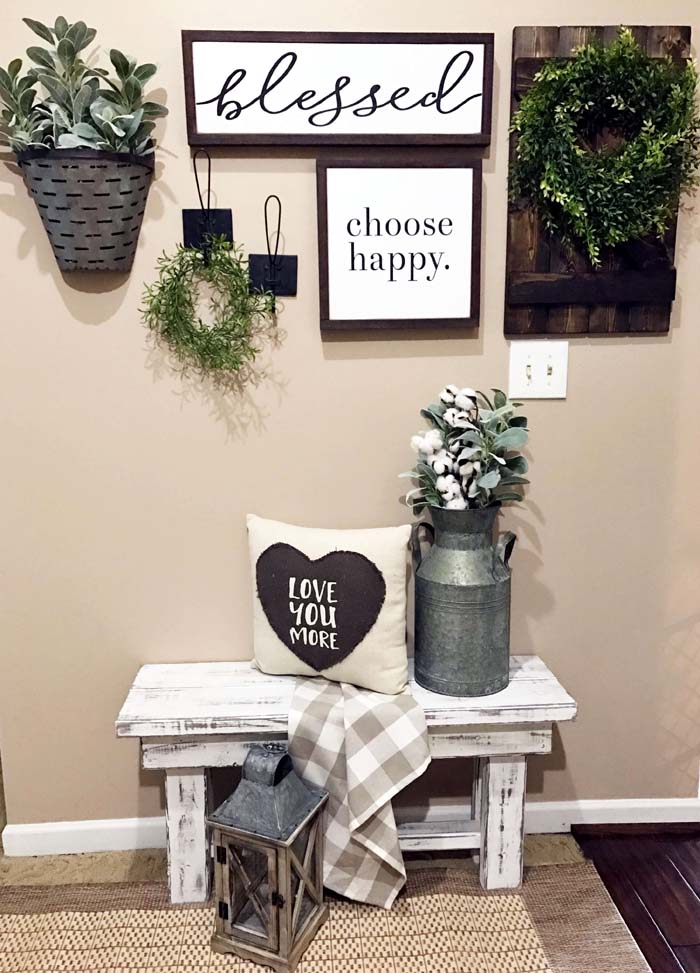
This entryway decor greets the family members with meaningful and precious thoughts which make every day more cheerful and valuable.
That is achieved with a small weathered bench on which a pillow with a heart-patterned fabric takes a central place.
The black and white combo continues to the wall where we can see two farmhouse signs.
Around them, there are planters and wreaths that add the natural element and colors to the neutral setting.
Eclectic Entryway With Vintage Textures
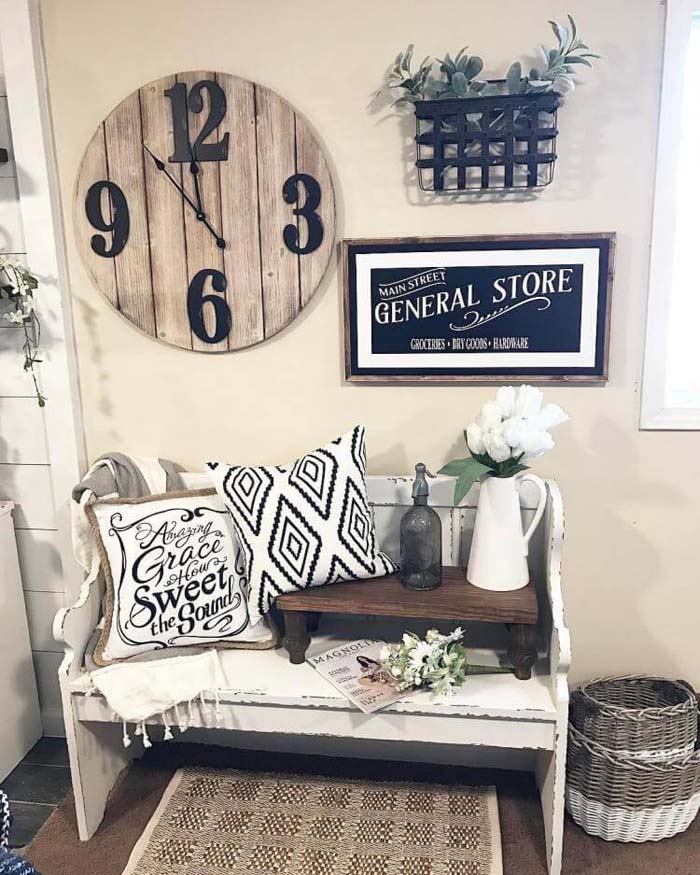
Looking at this nook, there isn’t a piece that ain’t with a farmhouse impact.
Starting with the small countryside rug, continuing with the old bench with a weathered look decorated with pillows and a throw with typical rustic fabric patterns and textures.
The wall displays a large clock made of a barrel bottom. The metal wire basket and the wicker one are typical representatives of the cottage storage containers.
The added flowers make a perfect addition to the arrangement to make it look more alive and fit it into the contemporary world.
Oversized Metal Bucket
:max_bytes(150000):strip_icc():format(webp)/HG103-Spitzer-Interiors-2-Dining-Room-3-scaled-ec1fd07c34ee47a3b0710b01abbdbc26-83fa13eab70e4452b4a46cf9ffe445af.jpg) Design by Leanne Ford Interiors / Photo by Erin Kelly
Design by Leanne Ford Interiors / Photo by Erin Kelly
Leanne Ford Interiors hung a rustic vintage metal bucket on the wall of this farmhouse dining room.
It can be left empty or filled it with leafy green garden cuttings that can be swapped out seasonally with anything from eucalyptus stems to pine branches.
Vintage Frames
A mix of framed vintage-style landscape paintings and empty gilded frames of varying shapes and sizes with an aged patina add some farmhouse style to this living room from Ashley Montgomery Design.
Look for affordable secondhand frames at thrift stores, flea markets, or online.
Painted Pegboard
:max_bytes(150000):strip_icc():format(webp)/LFICottage2022FEELFREEWEB-10-024cc80470a74dbdac1e5d8159ef5d7b.jpg) Design by Leanne Ford Interiors / Styling by Hilary Robertson / Photo by Erin Kelly
Design by Leanne Ford Interiors / Styling by Hilary Robertson / Photo by Erin Kelly
A painted pegboard can add extra easy storage and display space in any room in the house while lending a timeless farmhouse feel.
This staircase landing pegboard in a farmhouse cottage from Leanne Ford Interiors is styled with hanging baskets, dried flowers, art, and objects.
Decorative Clock
Vintage and antique wall clocks are a hallmark of farmhouse style decor.
Michelle Berwick Design chose a modern interpretation of a vintage-style farmhouse wall clock for this modern farmhouse dining room.
Decorative Plates
Displaying decorative plates on a plate ledge or dining room wall is a farmhouse-style tradition.
To keep it from feeling too much like a mythical grandma’s house,
Becca Interiors hung a row of neutral-toned plates above the windows in the living room.
Vintage Mirror
:max_bytes(150000):strip_icc():format(webp)/spring-2-259ed7f70ee049b8b7af59d2741d1816-2020cfcf4c514fcb8f6a3706fca2b8aa.jpg) Decorating with mirrors is a neat trick that can bounce light around and make any space feel brighter.
Decorating with mirrors is a neat trick that can bounce light around and make any space feel brighter.
While gilded mirrors might not have originated in farmhouses, today a nicely worn vintage or antique mirror is a regular feature of modern farmhouse style like this space from Thistlewood Farms.
Reclaimed Wood Shelf
Using reclaimed materials will add a rustic farmhouse feel to any space while being kinder to the planet.
Lobster and Swan hung a reclaimed wood shelf on the wall of this English country kitchen that is decorated with everyday objects, botanical art, and cuttings from the garden.
Vintage Sconce
Ashley Montgomery Design hung a vintage gilded wheat bunch sconce on the wall for an elegant feel that borrows more from a country manor than a rustic farmhouse.
Copper Pots
:max_bytes(150000):strip_icc():format(webp)/LEANNE_POCHAPIN_104-1-bdc9f93325d642caa96d6d3a4292f8f3.jpg) Design by Leanne Ford Interiors / Photo by Erin Kelly
Design by Leanne Ford Interiors / Photo by Erin Kelly
Whether decorative or used for everyday cooking, hanging a row of shiny copper pots from a rack on the wall in the kitchen will lend it an easily recognizable dose of farmhouse style, like this space from Leanne Ford Interiors.
Hat Rack
A vintage hat and coat rack and pair of sconces hung on a wallpapered wall above a rustic wood daybed-style bench complements the warm farmhouse feel of this entry space from Becca Interiors.
Architectural Salvage
Salvaged pieces such as an old wheel, wall or alarm clock, or an interesting piece of an old room or building will add texture to a farmhouse room.
My 100-Year-Old Home hung a pair of vintage porch railing architectural salvage pieces above the beds in this Waco, TX vacation home that invites curiosity.where to source architectural salvage
Architectural salvage yards, flea markets, antique shops, and online retailers are excellent sources for farmhouse wall decor that will add a sense of history to your space.
Still Life
Thrift stores and flea markets are great sources for affordable art that will help you personalize your home.
A still life painting of fruit mounted on the white shiplap walls above the headboard adds warmth to this cozy modern farmhouse-style bedroom from Ashley Montgomery Design.
Fresh Flowers
:max_bytes(150000):strip_icc():format(webp)/LEANNE_RINEMAN_006-bdf6bada267d43c2a90953278eac6975.jpg) Design by Leanne Ford Interiors / Photo by Reid Rolls
Design by Leanne Ford Interiors / Photo by Reid Rolls
On the wall above the corner cafe table in this farmhouse kitchen from Leanne Ford Interiors, a small bunch of fresh flowers is tied with twine and hung upside down on the wall to dry.
Swap out eucalyptus branches or hard herbs like rosemary or thyme if you like.
Vintage Portrait
The flea markets, thrift shops, and attics of the world are full of painted portraits of random humans whose histories we can only imagine.
Hanging a painted portrait on the wall like this bearded gentleman in an open-plan eat-in kitchen from Ashley Montgomery Design will add an air of history and mystery to your space.
Wooden Cutting Boards
:max_bytes(150000):strip_icc():format(webp)/Faraci-31-1-2d5297d0871245248fd3b0880db02f16.jpg) Design by Leanne Ford Interiors / Photo by Alexandra Ribar
Design by Leanne Ford Interiors / Photo by Alexandra Ribar
Wooden cutting boards of any shape or size add a farmhouse feel to the walls of any kitchen, like this open modern farmhouse-style kitchen from Leanne Ford Interiors.
If you’ve got a collection of cutting boards in various shapes and sizes, or a vintage collection that you like to look at but don’t use, consider hanging a wood cutting board gallery wall.
Vintage Medicine Cabinet
A vintage medicine cabinet with original paint and the battle scars of decades of service give this English country bathroom from Lobster and Swan a comforting and familiar farmhouse feel.
The moody black walls of the space allows the wall decor to stand out.
Upcycled Door
:max_bytes(150000):strip_icc():format(webp)/LEANNE_RINEMAN_035-28d003d3a96643f29fe3428efcce824c.jpg) Design by Leanne Ford Interiors / Photo by Reid Rolls
Design by Leanne Ford Interiors / Photo by Reid Rolls
Limit your palette to shades of white for a cohesive feel.
This approach will allow you to mix styles, finishes, and new and old furniture and decor without having to overthink it, like this renovated farmhouse from Leanne Ford Interiors that is decorated with an upcycled vintage door repurposed as a coat rack.
Metal Drying Rack
Farmhouse style celebrates everyday objects by keeping them on display.
A black metal vintage-style dish rack mounted to the shiplap wall lends this open-plan kitchen from Ashley Montgomery Design some modern farmhouse style.
Dried Flowers and Branches
:max_bytes(150000):strip_icc():format(webp)/LEANNE_SMITH_086-75805a978cf14a9aa11aeca6215d27dc.jpg) Design by Leanne Ford Interiors / Photo by Reid Rolls
Design by Leanne Ford Interiors / Photo by Reid Rolls
Decorating with natural elements is eco-friendly, inexpensive, and guaranteed to make your home feel inviting.
Hanging bunches of eucalyptus or preserved flowers from twin pegboard rails in this bathroom from Leanne Ford Interiors adds a natural decorative element that smells good, too.
Vintage Silhouette Pictures
A collection of vintage silhouette pictures mixed with old school signage and objects like mirrors and brushes adds a focal point to this farmhouse bathroom from blogger Liz Marie, while a vintage wood mantel piece with lightly chipped paint anchors the wall.
Galvanized Tub Wall Clock Steals The Show
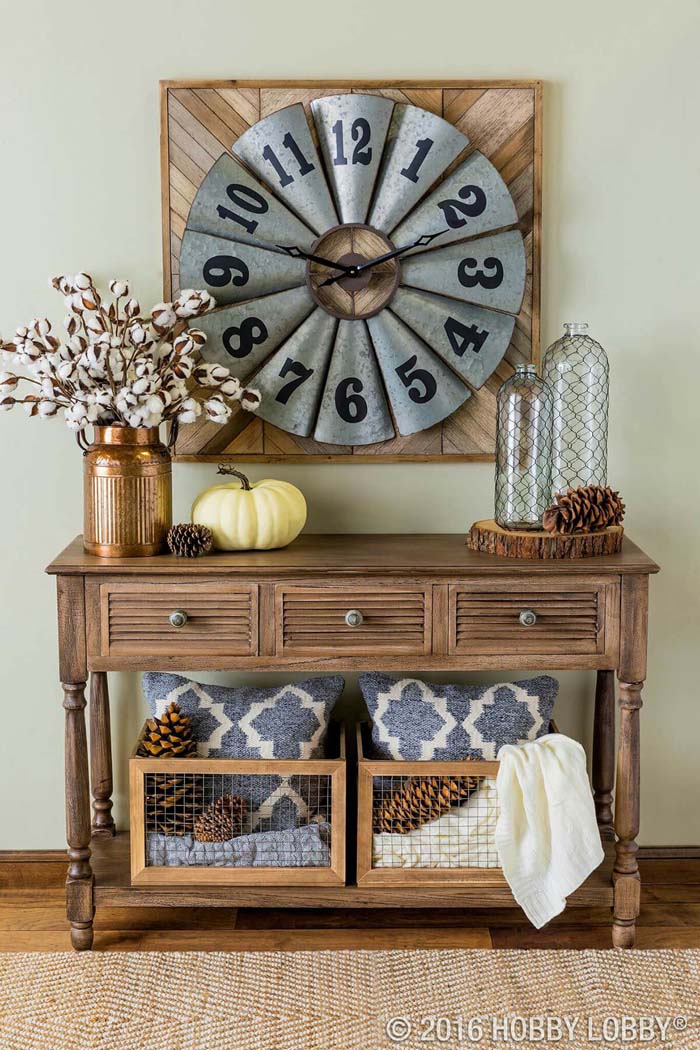
Using pumpkins in the farmhouse decor quickly changes it from universal to seasonal.
This natural motif wouldn’t have looked so interesting if it wasn’t for the antique dresser and existing accents. The bottom level is occupied with two baskets made of wood and wire.
The top displays copper milk can be repurposed into a vase, a slice of wood serves as a tray for two large glass bottles wrapped in a net.
The most impressive piece of this entryway decor is the unique vintage clock. Looking like a windmill, it is attached to a plaque with a mosaic slab effect.
Add Wood Texture With A Barn Door
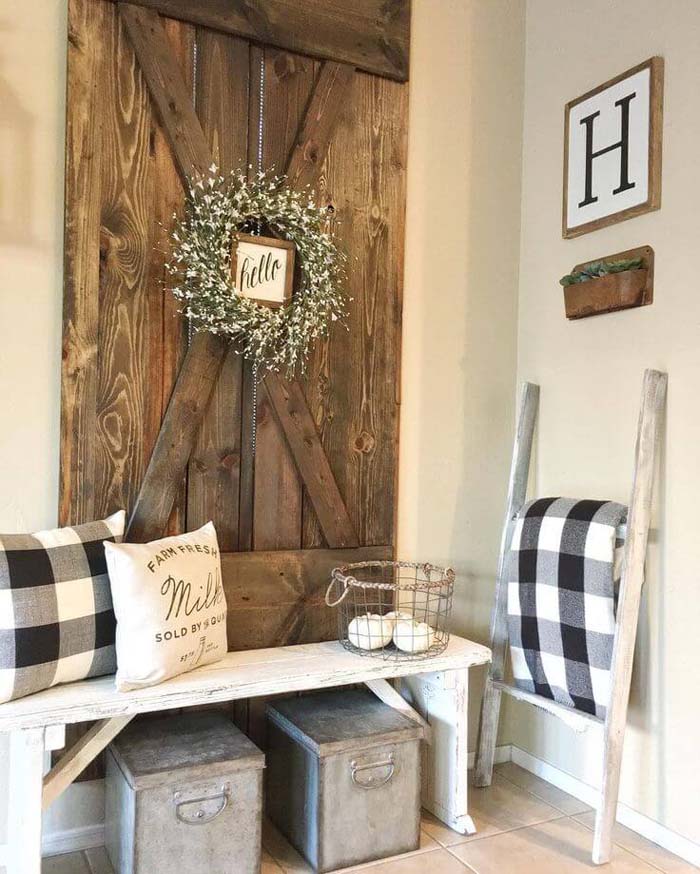
The entryway should be cozy and inviting as it creates the first impressions when it comes to the internal part of a home.
This is why the farmhouse decor is the most common style used for this space.
Add a bench to ensure sitting places, storage containers like wicker baskets or galvanized metal cases. The leaned ladder can become a rack for coats or blankets if you want to state how welcoming your home is.
A barn wood door becomes the background of the entryway to create a homely warmth. Hanging a wreath on it will save an element from the original purpose of the door.


:max_bytes(150000):strip_icc():format(webp)/258105_4348373014174fb6a11be1114c7c28a7mv2-d7da09bc62f14eeaa3490aa382917823.jpeg)
:max_bytes(150000):strip_icc():format(webp)/MCH_0974-a3def4d9888841278de45a0448cae7d1.jpg)
:max_bytes(150000):strip_icc():format(webp)/20230117_BeccaInteriors-20-2c1bde1c4f534bc39601950c1f5dce74.jpg)
:max_bytes(150000):strip_icc():format(webp)/lobster-and-swan-kitchen-makeover-2021-8-e0f8db54ee114d1a8c41590010bf0ace.jpg)
:max_bytes(150000):strip_icc():format(webp)/258105_21de16c2e0a24e85b79fa2e0cbcd1c94mv2-cedaac31035a4689accd1b3bc83d4c0e.jpeg)
:max_bytes(150000):strip_icc():format(webp)/20230117_BeccaInteriors-282-min-0aaef42dad8c4c9bae3f2861f7c33194.jpg)
:max_bytes(150000):strip_icc():format(webp)/The-Middle-Bedroom-in-our-Airbnb-Waco-Home-1536x2048-9c90d1edddc44cb3809a6b6a33e6635e.jpg)
:max_bytes(150000):strip_icc():format(webp)/de0a09_9c95510b14ae414bac170d291bdb92cbmv2-413945bb193f4f87ac7ca02480f8cbdf.jpeg)
:max_bytes(150000):strip_icc():format(webp)/de0a09_84abd0bde7fa4bfbb8a71fc04cb8b959mv2-8da68122fbf34045bb200136f4a0cdc5.jpeg)
:max_bytes(150000):strip_icc():format(webp)/moody-bathroom-styling-41-eb23ec402df043a3bfabde0d6d505155.jpg)
:max_bytes(150000):strip_icc():format(webp)/de0a09_e8fbabaa32bb4b4e816c334f202a2055mv2-c69694d5e7d14f2085cffe545abd763b.jpeg)
:max_bytes(150000):strip_icc():format(webp)/Photo-Oct-19-12128eeaa3e24eacbdecfee41342fa03.jpeg)